

Turning your standard-issue Graduation Cap and Gown into a personal statement is all about telling your unique story. It's a chance to brainstorm a meaningful design, grab the right creative supplies, and—most importantly—understand your school's guidelines so your masterpiece gets its moment in the spotlight. From bold, intricate artwork to simple, elegant quotes, this tradition is the perfect way to celebrate your journey.
Crafting a Graduation Cap That Tells Your Story

Graduation day is so much more than a ceremony. It's a celebration of years of hard work, late nights, and personal growth. Transforming that standard-issue cap into a canvas for self-expression has become a cherished rite of passage for grads everywhere. It’s your opportunity to stand out in a sea of identical gowns and share a piece of who you are.
This creative tradition lets you honor your past, celebrate your present, and give a nod to your future. Whether you're paying tribute to your family, repping your field of study, or just sharing a favorite quote, a decorated cap is a powerful symbol of everything you've accomplished. It becomes an unforgettable part of your commencement photos and a treasured keepsake long after the tassels are turned.
Why Personalize Your Graduation Cap
Decorating your cap is a unique way to send a message without saying a single word. Think of it as the final project of your academic career—one that's deeply personal and can serve all kinds of purposes.
- Expressing Gratitude: Acknowledge the parents, mentors, or friends who had your back along the way.
- Showcasing Your Passion: Represent your major, a future career, or a hobby that truly defines you.
- Celebrating Your Heritage: Incorporate cultural symbols, flags, or patterns that honor your background.
- Sharing a Message of Hope: Use an inspirational quote or a funny remark to connect with your fellow graduates.
Understanding the Rules First
Before you break out the glitter and glue, it's absolutely essential to check your institution's rules. While many schools fully embrace this tradition, some have specific guidelines or restrictions on what’s allowed.
A quick check of your school's commencement handbook or website can save you from having to create a new design at the last minute. This simple step ensures your hard work complies with the ceremony's decorum.
Failing to follow the rules could mean you’re asked to swap your creation for a plain, undecorated cap for the ceremony. To dive deeper into the creative process from start to finish, you can explore our detailed guide on how to decorate a graduation cap, which covers everything from initial concepts to final application. Let's make sure your design gets seen and celebrated.
Alright, let's get you set up for success. Before you can bring that awesome cap design to life, you’ve got to gather your creative arsenal. Picking the right tools isn't just about what looks good—it's about making sure your masterpiece actually survives the big day.
Think of this as your pre-project mission. The right supplies make the entire process smoother and a whole lot more fun. And of course, it all starts with having a great blank canvas. A high-quality Graduation Cap and Gown gives you the perfect foundation to work with.
One of the best pieces of advice I can give you is to avoid decorating directly on the cap itself. Instead, create a removable base. Just grab a piece of sturdy cardstock or a thin foam board and cut it to the exact size of your mortarboard. This trick is a total game-changer. You can experiment, mess up, and start over without ever risking damage to your actual regalia. Plus, if your school has strict rules, you can just pop it off after the ceremony.
Choosing Your Core Decorating Supplies
With your base ready to go, it’s time to think about bringing your design to life. Paint is a go-to for a reason—it’s incredibly versatile.
For most projects, acrylic craft paint is a fantastic choice. It gives you great, opaque coverage on cardstock and fabric alike. If you’re painting directly on a gown or stole, though, you might want to grab some fabric paint, which is specially designed to flex and move without cracking.
Want those super crisp, professional-looking letters you see all over Pinterest? Stencils are your best friend. You can pick up pre-made alphabet and shape stencils at any craft store, or you can print your favorite font, trace it onto stencil paper, and cut it out with a craft knife. It takes a little patience, but the polished result is so worth it.
Adhesives and Embellishments
Now, let's talk about making things stick. The glue you choose is non-negotiable for a design that lasts. For anything with a bit of weight—like rhinestones, faux flowers, or 3D craft foam shapes—you need a heavy-duty craft adhesive. I swear by products like E6000 or Gorilla Glue Clear Grip because they create a permanent, waterproof bond.
For lighter stuff like glitter, paper cutouts, or ribbon, your trusty hot glue gun or a standard craft glue will do the job just fine.
Pro Tip: If you're working with tiny rhinestones or gems, a wax pencil or a good pair of tweezers will save your sanity. These simple tools give you incredible precision for picking up and placing small embellishments, which means no more frustrating glue smudges all over your design.
To make your supply run a little easier, it helps to see how the most common materials stack up against each other.
Graduation Cap Decorating Supplies Comparison
Picking the right materials really comes down to the look you're going for, your comfort level with different crafts, and your budget. This table breaks down the essentials to help you build the perfect toolkit for your project.
| Material | Best For | Difficulty Level | Average Cost |
|---|---|---|---|
| Acrylic Paint | Bold, painted designs and custom lettering. | Easy to Moderate | $ |
| Rhinestones/Gems | Adding sparkle and intricate patterns. | Moderate | $$ |
| Faux Flowers | Creating 3D floral and botanical themes. | Easy | $$ |
| Iron-On Patches | Quick, no-fuss application of letters and symbols. | Easy | $ |
| Craft Foam | Building lightweight, layered 3D elements. | Easy to Moderate | $ |
This little breakdown should help streamline your shopping list, so you can walk into the craft store with a solid plan. Once you’ve gathered your supplies, you're officially ready for the best part—turning that blank cap into a masterpiece.
Bringing Your Design to Life: Techniques From the Pros
Alright, you’ve got your supplies, and your head is buzzing with ideas. Now for the fun part—turning that blank mortarboard into a statement piece. This is where your vision really starts to take shape. Let's walk through some of the most popular ways to decorate your cap, so you can create something you're truly proud of.
First up is painting, a total classic for a reason. It’s incredibly versatile. Whether you’re planning a detailed masterpiece, a soft color gradient, or just some clean, bold letters, acrylic paint is your best friend. Before you even open the paint, lightly sketch out your design with a pencil or a piece of chalk. This gives you a roadmap to follow without leaving any permanent marks.
Here’s a pro tip: if you want your colors to be super bright and vibrant, start with a thin base coat of white paint. Let it dry completely. This one simple step keeps the dark fabric of the cap from making your colors look dull. Grab a few different brushes—a super fine one for the details and a wider one for filling in bigger spaces—to get that clean, polished look.
Adding Texture with Fabrics and Accessories
Paint is great, but adding different textures can take your design to a whole new level. Think about incorporating fabric, flowers, or other 3D elements to create some real visual pop and a rich, layered look. You could cover the whole cap topper with a cool fabric or just use small pieces to accent your design.
Meaningful accessories are also a fantastic way to tell your story. For example, wearing one of our custom Kente stoles or First Generation stoles alongside your cap design adds a powerful layer of heritage and achievement to your entire look. They’re designed to perfectly complement your gown and make your moment even more significant.
There's a reason the market for personalization is exploding. In recent years, US families have spent over $6.1 billion on graduation items alone, and that number is only going up. A huge part of that is custom regalia like stoles, honor cords, and decorated caps that add that personal touch.
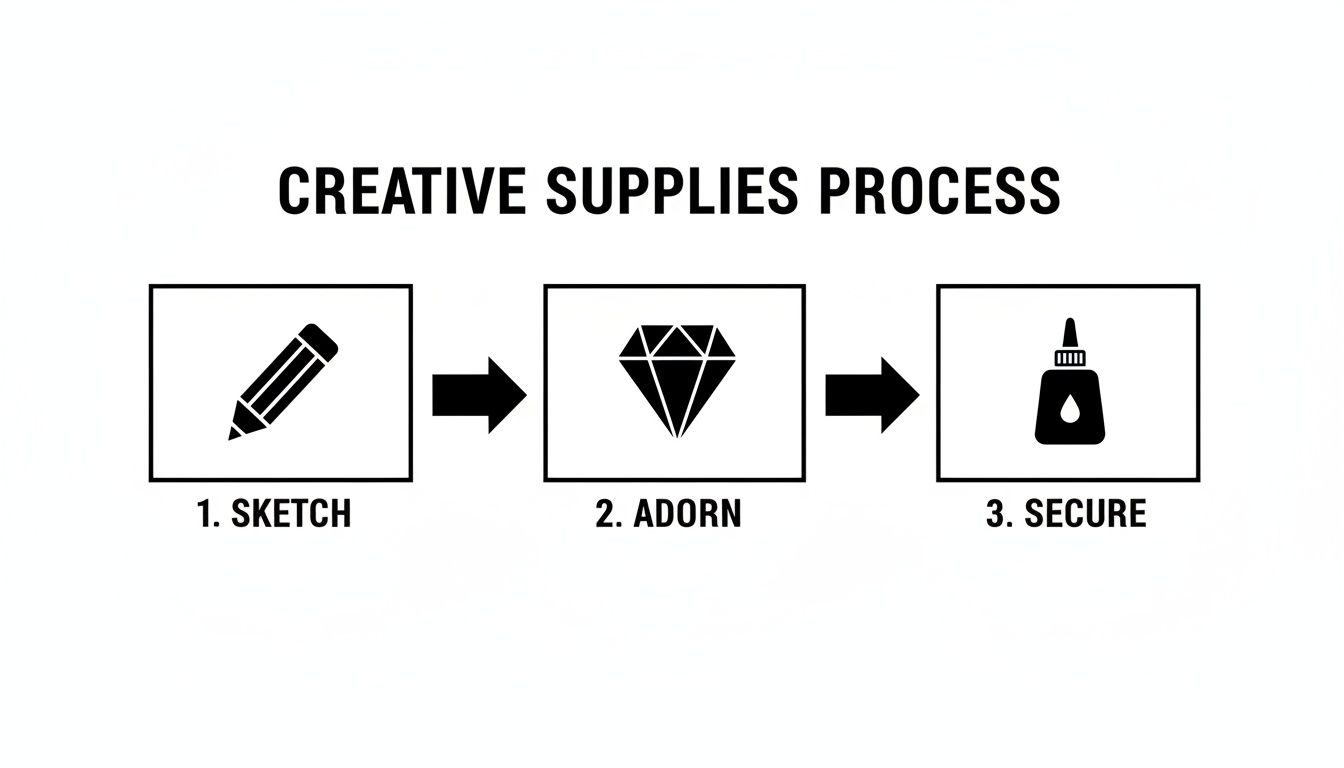
This workflow gets it right: a great cap design always starts with a solid plan, moves into the creative work, and finishes by making sure every single piece is locked down and ready for the big day.
The Art of Gluing for Maximum Sparkle
For anyone whose motto is "more sparkle," you've got to master the art of gluing. Attaching rhinestones, pearls, and other little gems takes a bit of precision and the right glue to avoid a sticky mess. A strong, clear-drying craft glue like E6000 is perfect for a secure bond that will last through all the photos and celebrations.
Here are a few insider tricks to get it right:
- Use a Wax Pencil: This little tool is a game-changer. A wax-tipped pencil lets you pick up and place tiny gems with pinpoint accuracy.
- Work in Small Sections: Don't try to cover the whole cap in glue at once. Apply it to a small area at a time so it doesn't dry before you can place your embellishments.
- Do a Dry Run: Arrange your rhinestones on the cap before you start gluing. This lets you perfect your pattern and make sure everything fits just right.
A steady hand and a little patience are your best tools here. Rushing the gluing process is the fastest way to get smudges and crooked lines, so just take your time.
If you’re thinking about more advanced designs, it helps to understand how different materials work. For instance, some of the techniques for applying DTF transfers to hats can offer some really useful ideas for working on the unique surface of a graduation cap.
And once your masterpiece is complete, the final touch is adding the tassel. To make sure you get it right, check out our guide on how to put the tassel on your graduation cap.
Personalizing Your Message and Celebrating Your Identity

Your graduation cap is so much more than a piece of academic regalia. It’s a four-cornered canvas ready to broadcast your story to everyone in the room. Deciding what message to put on it is easily the most personal part of decorating your cap and gown, giving you a final word that defines your entire academic experience.
So, what really matters to you? It could be a motivational quote that got you through late-night study sessions, a heartfelt "Thanks, Mom & Dad," or a clever pop culture reference that perfectly captures your sense of humor. Whatever you choose, your message sets the entire tone for your creation.
Brainstorming Your Cap's Core Theme
Before you bust out the glue gun, take some time to reflect on your journey. What themes resonate the most with you? Thinking in categories can help you narrow down your focus and land on the perfect words.
Here are a few popular and impactful themes to get you started:
- Words of Gratitude: A simple but powerful way to thank the family, friends, or mentors who supported you. Phrases like "The Best Is Yet To Come, Thanks To You" or "She Believed She Could, So They Helped Her" are timeless for a reason.
- Future Aspirations: Give everyone a sneak peek of your next chapter with symbols of your chosen profession. Think a stethoscope for a nursing major, scales of justice for a future lawyer, or a simple "Future Teacher" declaration.
- Humor and Pop Culture: Lighten the mood with a funny quote from your favorite TV show or a witty one-liner about student loans. A cap that says, "Finally Finished My Longest Netflix Binge Ever" is sure to get a few laughs.
Your cap is a personal billboard. Choose a message that feels authentic to you, whether it’s profound, funny, or a simple expression of joy. This is your moment to be seen and heard.
Celebrating Your Unique Heritage and Identity
Beyond quotes and career goals, your cap is the perfect place to honor who you are. Celebrating your cultural background or personal identity can make graduation day even more meaningful, creating a beautiful design that is uniquely yours.
This trend toward personalization is a huge part of modern ceremonies. In the US alone, where over 4 million students graduate from high school and college each year, this boom is fueled by a desire for inclusivity. Think Kente cloth stoles celebrating African heritage or flags for first-generation graduates—these touches make ceremonies so much more meaningful.
For example, incorporating patterns from a cultural stole, like a vibrant Kente cloth stole design, is a stunning way to honor your heritage. You could also display a small international flag for your home country or add Greek letters to celebrate your fraternity or sorority bonds. For a deeper dive into how different stoles represent achievement and identity, check out our guide on the different types of graduation stoles.
Whether you're a first-generation graduate or part of a specific academic society, your cap can proudly display the communities that shaped you.
Making Sure Your Masterpiece Lasts Through Commencement
You’ve poured all your creativity into the perfect design, and now there’s just one last thing to do: make sure it actually survives the big day. A little prep work now will ensure your masterpiece looks just as amazing during the cap toss as it did in your workspace. Durability is key, whether you’re protecting your artwork from the elements or just balancing the whole thing on your head.
The most common headache for grads is smudged paint or a trail of shedding glitter. A quality sealant is your absolute best friend here. After your design is totally dry, learning how to seal acrylic paint can be a lifesaver, protecting all your hard work. A clear, non-yellowing acrylic sealer spray is perfect for the job.
If you painted your cap, hold the can about six inches away and apply a light, even coat. Remember, two thin coats are always better than one thick one, which can cause drips and ruin your design. For glitter, a spray-on adhesive sealant will lock every particle in place without dulling that incredible shine.
Securing Heavy Elements and Balancing Your Cap
If you got ambitious and added 3D elements like big flowers or resin figures, you’ve just created a practical challenge: weight distribution. An unbalanced cap isn’t just uncomfortable; it’s a prime candidate for falling off at the worst possible moment. A cap that constantly tilts is a common but totally preventable issue.
Here are a few tricks I’ve learned to keep things stable:
- Center Heavier Items: Place your heaviest decorations as close to that center button as you can. This is your cap's natural center of gravity.
- Use Strong Adhesives: Hot glue is great for lightweight stuff, but for anything with some real heft, you need an industrial-strength craft glue like E6000.
- Create Counterweights: If you have a heavy piece on one side, think about adding a smaller, complementary element on the opposite side to balance it out.
Before you call it done, do a quick "wear test." Seriously, put the cap on and move your head around. Walk a bit. This is the best way to spot any balance issues or loose pieces that need a little more glue before the ceremony. For more tips on getting the fit just right, check out our guide on how to put on a graduation cap.
One Last Thing: Check Your School’s Regalia Policy
Okay, final step. Take two minutes to review your school's regalia policy. While tons of schools embrace the tradition of decorating caps, some have specific rules about what’s allowed. You can usually find these guidelines in the commencement section of your school's website or in the student handbook. A quick check here ensures your amazing creation is both stunning and compliant.
By the way, sustainability is making a huge splash in graduation traditions. Grads are finding cool, eco-friendly ways to decorate, which is a big deal when you consider that a traditional polyester gown can take over 200 years to decompose. It's a global trend that’s making regalia both stylish and planet-smart.
Common Questions About Decorating Your Cap and Gown
Even with a perfect plan in mind, it's totally normal for a few questions to pop up once you actually start decorating your cap and gown. Don't worry, you're not alone. To help you push through with confidence, we’ve put together some straightforward answers to the queries we hear most often from grads in the middle of their creative process.
Think of this as your go-to guide for clearing those common hurdles, making sure your project stays on track and turns out exactly how you pictured it.
What Kind of Paint Works Best on a Graduation Cap?
When you’re ready to paint your cap, acrylic paint is your best friend. Its thicker consistency gives you great coverage on the cap's fabric and it dries into a durable, flexible finish that won't crack when the cap bends. For really vibrant colors, I recommend putting down a thin white base coat first and letting it dry completely before you start your real design.
Fabric paint is another fantastic option, since it's literally made for this kind of thing. You’ll want to steer clear of watercolors, which will just bleed into the fabric, and oil paints, which take way too long to dry when you're on a deadline.
How Do I Make Sure My Decorations Don't Fall Off?
A strong, reliable adhesive is everything here. For heavier items like big gems, faux flowers, or any 3D objects, you need a heavy-duty craft glue like E6000 or Gorilla Glue Clear Grip to create a permanent bond. For lighter things like ribbons or paper cutouts, a hot glue gun is usually more than enough.
A quick pro-tip: Always test your glue on a small, hidden spot before you commit to your main design. And if you've painted your cap, finish it off with a clear acrylic sealant spray. This will protect your artwork from smudges and shield it from any unexpected rain on commencement day.
Can I Decorate My Graduation Gown Too?
While decorating the cap is a huge and celebrated tradition, altering the gown itself is a no-go at most schools. Institutions almost always see the gown as formal academic attire and have pretty strict rules against modifying it.
Instead of changing the gown itself, you can personalize your look with approved accessories designed to be worn with it. This is a great chance to add things like:
- Custom Graduation Stoles: The perfect way to showcase your heritage, field of study, or affiliations with a club or Greek organization.
- Honor Cords: These display your academic achievements and memberships in honor societies.
- Medals: Represent specific awards or honors you've earned.
The golden rule is to always, always double-check your school's commencement rules before you add anything to your official regalia.
How Far in Advance Should I Start My Project?
Trust me, you don't want the stress of last-minute crafting. Give yourself plenty of time by planning to start your cap at least two to three weeks before graduation.
This timeframe gives you enough breathing room to gather all your supplies, sketch out a few ideas, carefully put the design together, and fix any mistakes without panicking. Most importantly, it gives your project at least 24-48 hours for any paint and strong glues to fully dry and cure, ensuring everything is locked in place for the big day.
Ready to find the perfect canvas for your masterpiece? At Graduation Cap and Gown, we offer high-quality regalia that provides the ideal starting point for any creative design. Find everything you need for a memorable celebration at https://www.graduationcapandgown.com.