

An 8.5 x 11 inch diploma usually fits an 11 x 14 inch frame with an 8.5 x 11 inch mat opening, but adding a graduation picture calls for a larger, separate-opening layout or a matching photo frame.
Diploma Frame Sizes and Mat Openings at a Glance
Frame sizes, mat openings and reference prices
| Frame size | Mat opening | What it fits | Etsy price (2025) |
|---|---|---|---|
| 8.5 x 11 in | 8.5 x 11 in, no border | Letter-size diploma with a tight fit | $121.00 |
| 11 x 14 in | 8.5 x 11 in | Standard diploma with a mat border, identified as the 2026 standard choice | $139.70 |
| 15.75 x 22 in | Custom-cut to the measured diploma | Oversized diploma or large display | $156.20 |
| 16 x 20 in, hypothetical combined layout | 8.5 x 11 in diploma plus 5 x 7 in photo opening, subject to layout proof | Diploma and small portrait in one frame | No reference price available |
The reference prices are 2025 Etsy listings from other sellers, not Graduation Cap and Gown's prices: the Etsy diploma-frame listing lists $121.00, $139.70 and $156.20 for the corresponding sizes above. Americanflat identifies an 11 x 14-inch frame with an 8.5 x 11-inch mat opening as its standard diploma choice for 2026.
You may have the diploma on the dining table, a portrait still in its photographer's envelope, and an empty patch of wall waiting. Before choosing a finish, establish which dimensions describe the paper, the mat and the completed frame.
Read the dimensions before choosing the finish
The mat opening is the window through which you see the diploma. The frame's advertised size usually describes the glazing or insert it accepts, not its outside dimensions; the moulding adds to the finished footprint.
For example, subtracting an 8.5 x 11-inch opening from an 11 x 14-inch mat gives a theoretical border of 1.25 inches at each side and 1.5 inches at the top and bottom. That's a worked layout calculation, not a guarantee of the visible border after the frame lip overlaps the mat.
Fit check: Measure the actual diploma sheet, not its presentation cover. Check that the proposed opening won't hide signatures, a seal or lettering.
Use the size table when comparing options through Graduation Cap and Gown, but don't assume a listed insert size guarantees space for a portrait. The wood diploma frame guide can help with material choices once the fit is settled.
For an oversized display, Colorado Art Services' guidance on wall-to-artwork ratios for large frames provides useful context for judging the finished footprint. Tape a paper template to the wall before committing to a large combined frame.
Layout Ideas for Pairing a Diploma and Photo
A diploma and portrait work like a two-page spread: each needs its own margin, and neither should run into the gutter. When comparing diploma frames with picture openings, judge the space between the objects as carefully as the decorative finish.
Choose the arrangement around the wall
Side by side in one frame suits a matched diploma and portrait on a hallway or stair wall. Give each object its own opening in a shared conservation-quality mat, with a clear bridge of board between them.
Stacked vertically in one frame makes better use of a narrow wall or the space above a desk. Keep the diploma visually dominant, but check the completed frame's weight before choosing a broad wood moulding.
Separate frames hung as a pair offer the most flexibility. A portrait can move to a bookshelf or be replaced without opening the diploma frame, which is useful when a graduate moves between home, a dormitory and an office.
A diploma inset in a photo collage carries the most sentimental detail and the greatest construction risk. The problem isn't sentiment; it's overlapping objects, improvised mounts and uneven thicknesses beneath shared glazing.
Diploma and photo layouts compared
| Layout | Best for | Space needed | Preservation note |
|---|---|---|---|
| Side by side in one frame, two openings | Matched pair on a hallway or stair wall | Wide wall span | Each piece gets its own opening and spacing |
| Stacked vertically in one frame | Narrow wall or space above a desk | Tall, narrow wall span | Separate openings, potentially heavier to hang |
| Separate frames hung as a pair | Flexible wall that may change later | Space for individual frames and a gap | Easiest to remove and reframe each item |
| Diploma inset in a photo collage | Sentimental display with many photos | Lay out every print before sizing the frame | Highest risk when items share glazing and improvised mats |
Matching frames can make separate objects feel like a deliberate pair.
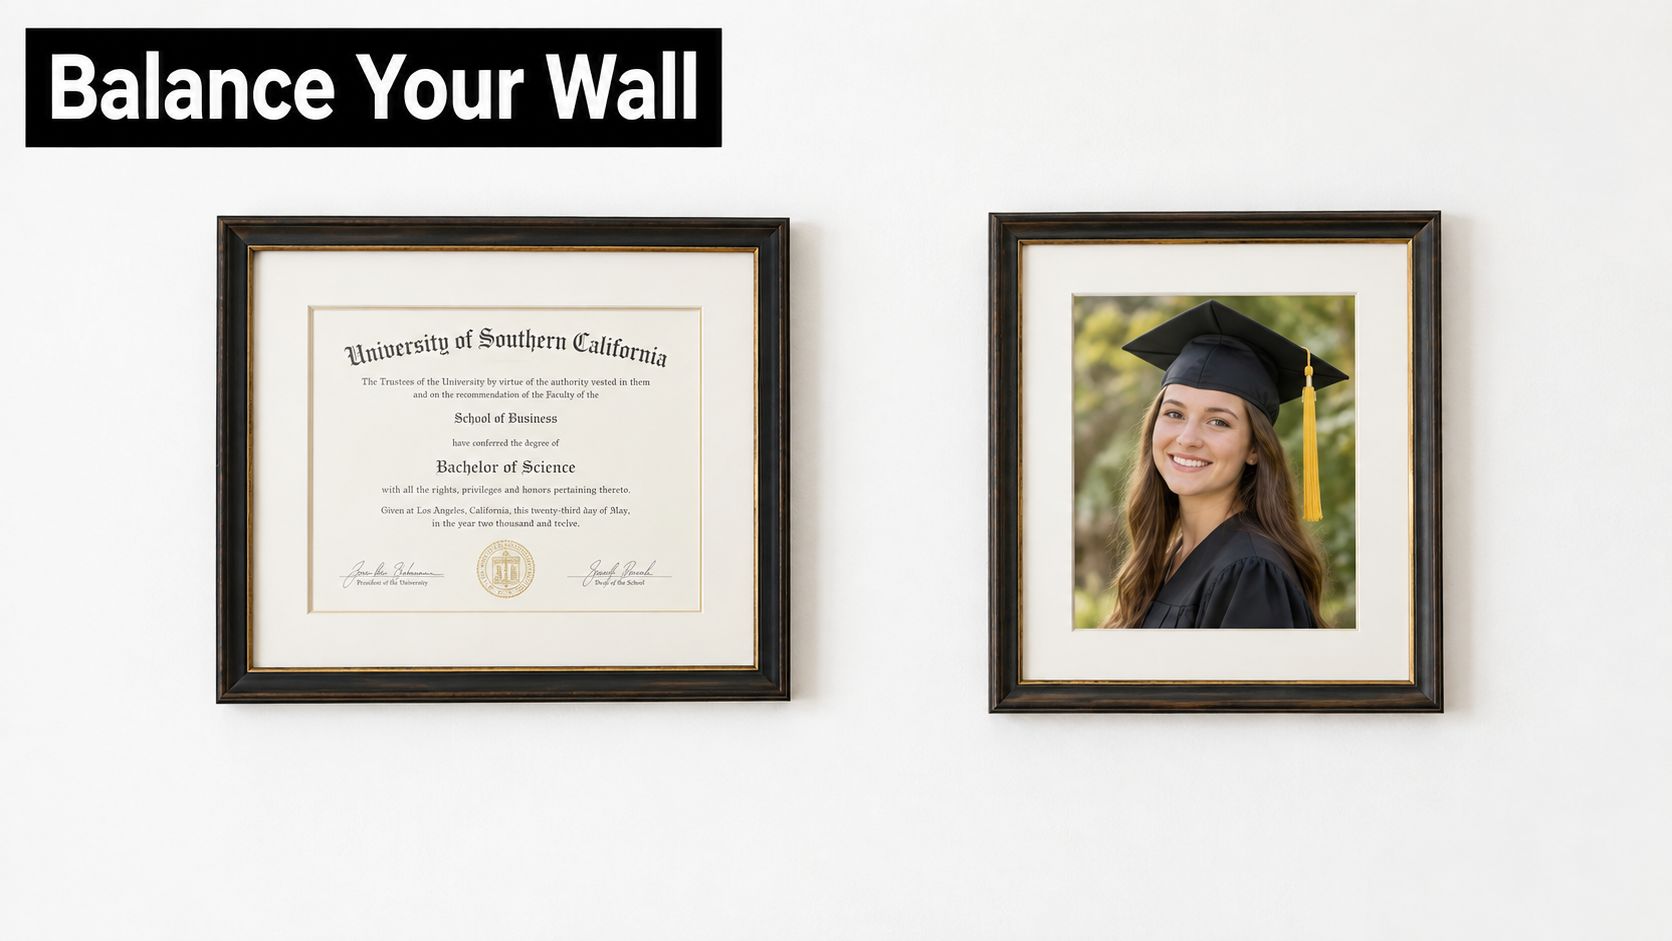
Balance the openings without overlapping keepsakes
For a side-by-side arrangement, keep the top margins equal and align the lower edges of the openings on a level line. Choose a portrait crop whose height complements the diploma, rather than stretching or trimming the original photograph.
Measure the printed portrait itself, excluding unwanted paper margins. Give its opening the same surrounding mat-border width as the diploma wherever the layout allows.
Family Tree Magazine's school-memorabilia preservation guidance supports treating these objects as removable keepsakes rather than permanently assembled decorations. Keep the photo from touching or overlapping the diploma.
For a single graduate with a favorite portrait, a separate-opening frame makes a coherent display. For siblings sharing a wall, individual matching frames are easier to rearrange; reserve bulky tassels and fabric for a cap-and-gown shadow box rather than squeezing them into a flat document frame.
Mat Board and Backing That Protect Both Keepsakes
A window mat does more than provide a colored border. It creates clearance between the keepsakes and the glazing, so changes in the paper don't push the diploma or photograph against the surface.
The Library of Congress photograph-preservation guidance recommends window mats or perimeter spacers to prevent contact-related sticking, abrasion and moisture damage; it also specifies photo-contact materials passing the Photographic Activity Test, standardized as ISO 18916, and suitable board of at least 4-ply, pH-neutral or slightly alkaline at approximately pH 8.5, made from 100% cotton rag or chemically purified, lignin-free wood pulp.
The clearance can come from a mat, spacers or a carefully designed combination.
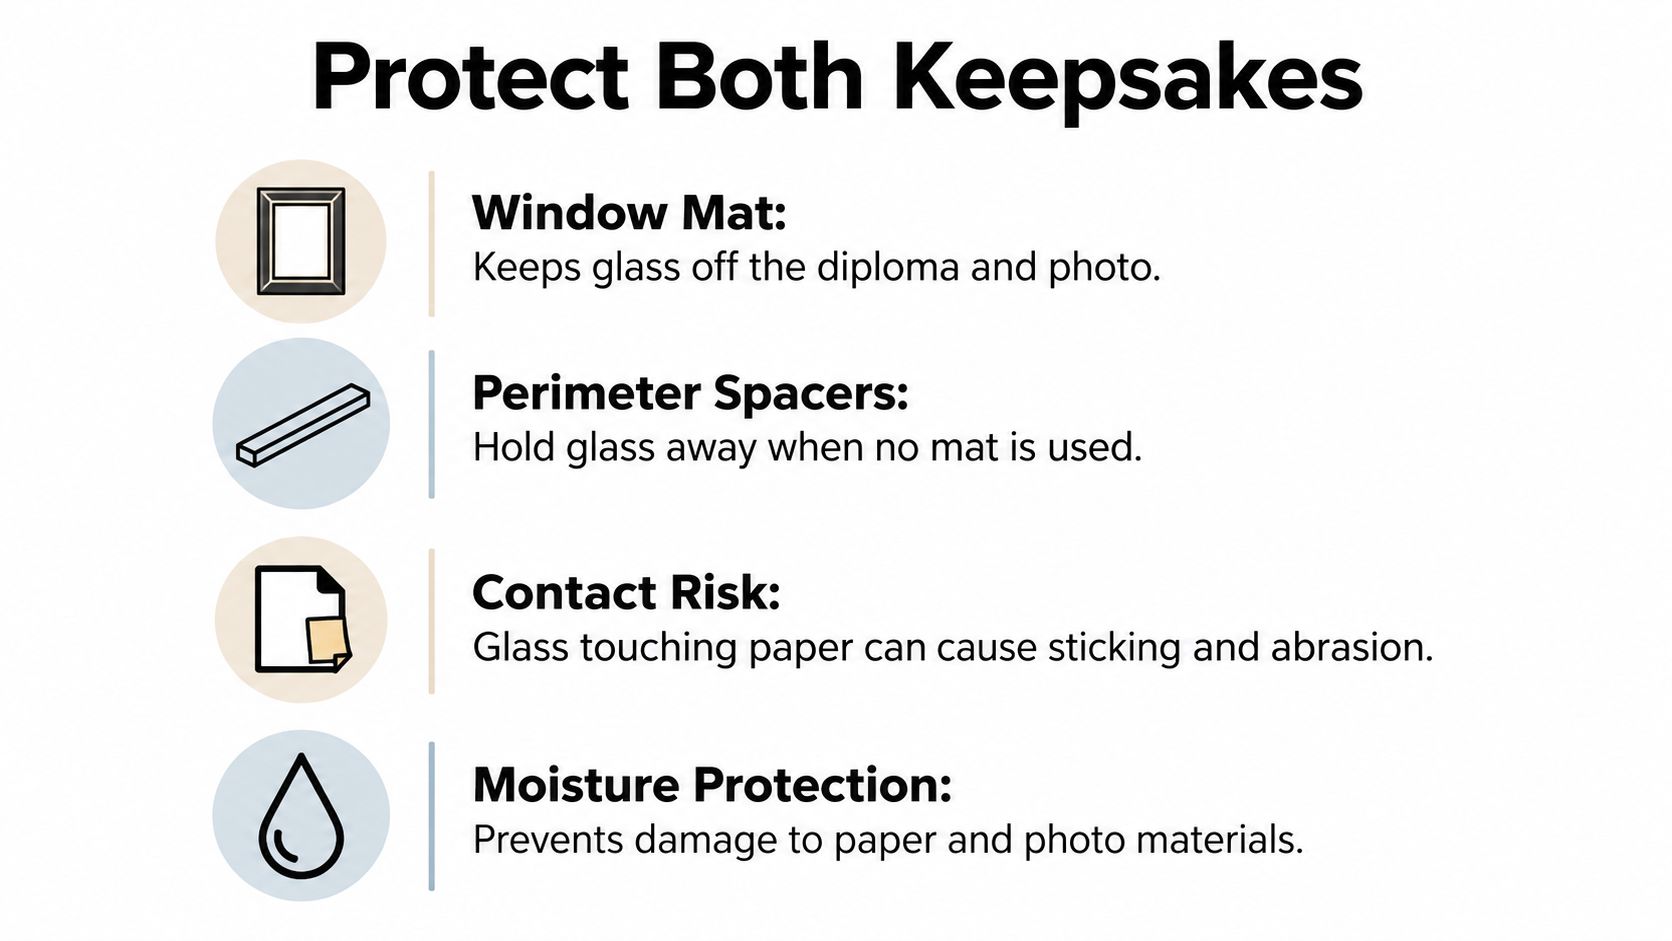
Specify the materials in this order
- Confirm PAT-tested contact materials. Every material touching the photograph should pass the Photographic Activity Test, which checks whether surrounding materials can harm photographs.
- Choose the board construction specified above. Cotton rag or chemically purified, lignin-free pulp provides a more dependable foundation than unidentified decorative board.
- Require a deep rabbet or spacer system. The rabbet is the recess holding the glazing, mat, keepsakes and backing; it must accommodate the complete assembly without compression.
- Use non-adhesive photo corners or reversible hinges. Avoid pressure-sensitive tape, glue and heat mounting, which can stain surfaces or make removal destructive.
- Keep the build removable. The back should open without sacrificing the diploma or portrait so either can be scanned, replaced or conserved.
These choices reduce chemical migration from surrounding materials and mechanical stress from tight mounting. They don't turn an ordinary room into permanent archival storage.
Read the specification, not the marketing label
A label saying “acid-free” doesn't tell you whether the photograph-contact materials are PAT-tested or whether the frame has enough depth.
Ask for the mat, backing and mounting specifications in writing before ordering a custom assembly. For another paper-collecting context, Famous Movie Posters' framing advice for film memorabilia collectors offers a useful companion perspective, though photographic-contact materials still need their own checks.
This video provides a visual companion to the framing discussion.
If the portrait is intended for decades of display, frame a reproduction and store the original separately. A custom diploma cover serves a different purpose from a display frame; don't assume its material or dimensions make it suitable as backing inside one.
Glazing, Placement, Weight and Viewing Height
UV-filtering glazing is like sunscreen rather than shade: it reduces exposure risk, but it doesn't make prolonged illumination harmless. A well-built frame still needs a sensible location.
Choose glazing by weight and impact risk
Acrylic is lighter and more impact-resistant than ordinary glass. That makes UV-filtering acrylic a practical choice for dormitories, school corridors, shipping and homes where children or pets might knock a frame.
The trade-off is surface care. Acrylic scratches more easily, so clean it with an acrylic-compatible cleaner and a clean microfiber cloth rather than paper towels or an abrasive household product.
Acrylic can also generate static. Avoid it over powdery or flaking media, including unstable decorative elements on a diploma, because loose material may be disturbed.
Glass is heavier and can shatter, but it resists routine cleaning scratches better and may be preferable around static-sensitive surfaces. Good-quality glass can provide crisp clarity, although clarity also depends on coatings and the particular product, not the material alone.
Adorama's graduation-frame guidance highlights the practical distinction between lighter, less shatter-prone acrylic and glass, along with choosing a frame suited to wall hanging or easel display. Neither material is automatically the best choice for every room.
Compare the handling trade-offs before selecting the largest frame.
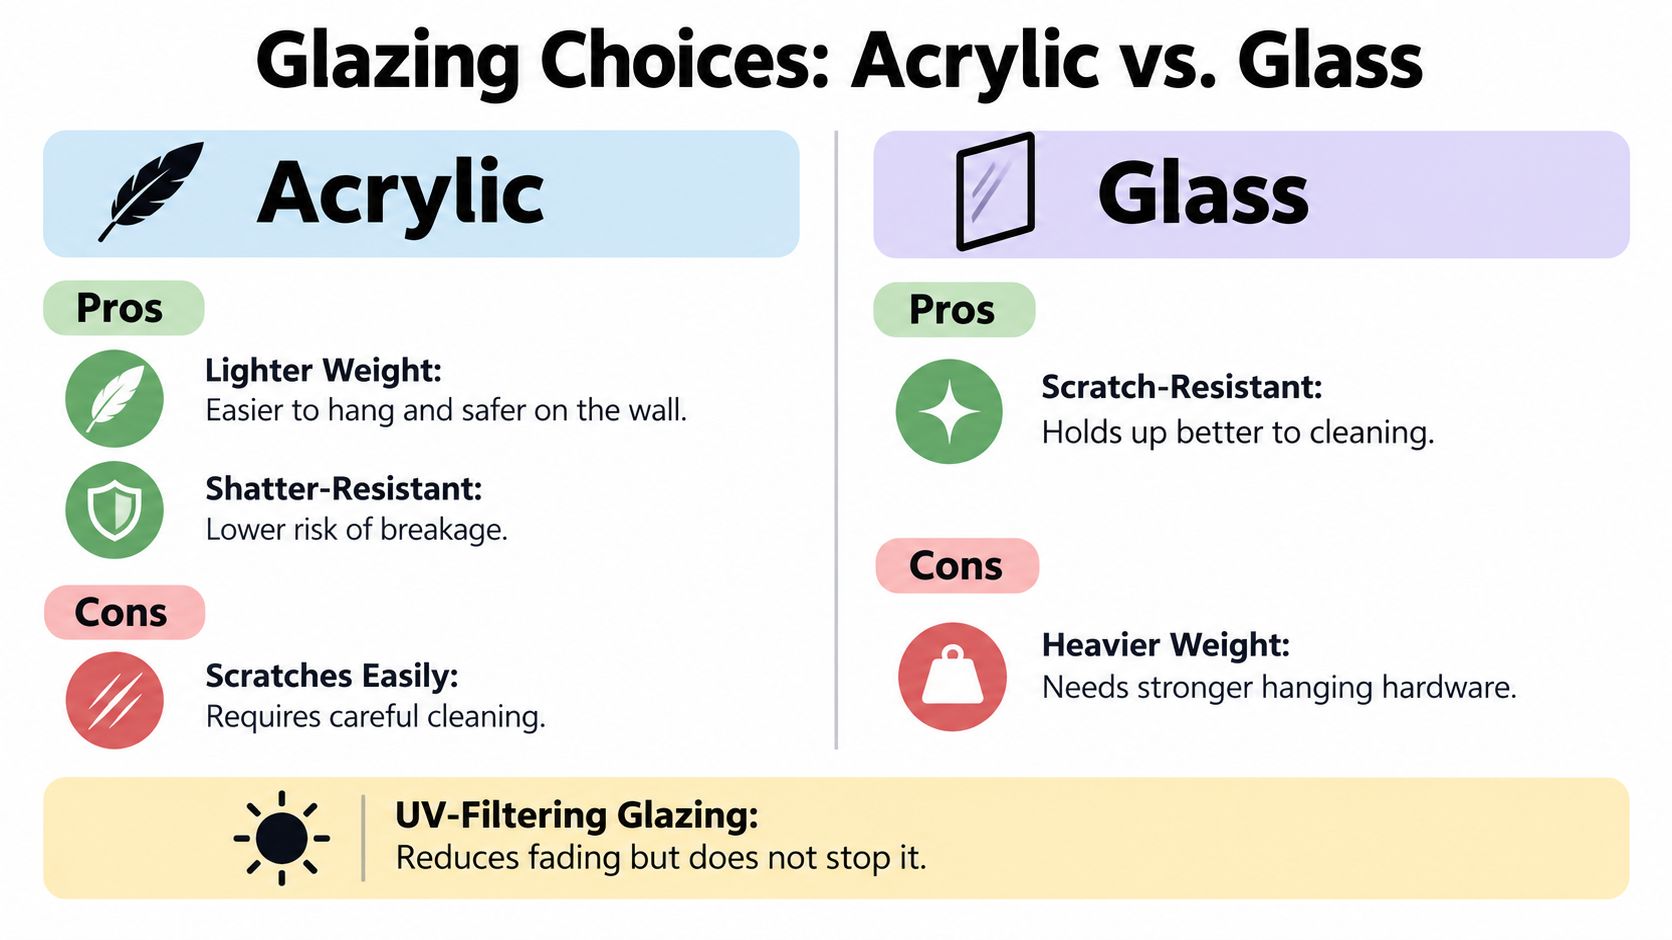
Test glare where the frame will hang
Etched non-glare glazing diffuses reflections, but it can soften fine lettering, especially when the diploma sits farther behind the glazing. Anti-reflective coated products can retain better clarity, usually at a higher price.
For an office, compare a sample over printed text under the actual ceiling lights. Stand where visitors will stand, then sit where someone would read the diploma during a meeting.
Don't confuse reflection control with UV filtration. Specify both properties when you need both, rather than assuming “non-glare” includes preservation protection.
Choose a stable interior location
Keep the frame away from windows, skylights and high-intensity lamps. Avoid bathrooms, kitchens, attics, poorly controlled basements and exterior walls where condensation or rapid environmental changes are a concern.
The Library of Congress matting and framing guidance identifies temperature, humidity, lighting and surrounding materials as key exhibition variables, with photographic guidance targeting roughly 30–50% relative humidity and daily cycling limited to about ±5 percentage points. Its paper-document storage guidance recommends 30–40% relative humidity, a cool, stable room and avoidance of direct or intense light.
For a mixed diploma-and-photo display, a stable room within the overlapping range is a sensible target. Use a digital hygrometer to check the proposed location instead of judging humidity by how the room feels.
A well-fitted frame and rigid acid-free backer help protect the contents, but a closed back won't solve a damp wall. Move the display rather than trying to seal a moisture problem inside it.
Match the hanging system to the finished assembly
Weigh the completed frame with its glazing and backing installed. Match the hardware's stated rating to that finished weight and to the wall construction, not to the empty moulding.
- Drywall installation: Use a suitable rated anchor or secure the fixing into a stud; don't rely on an unanchored screw in plasterboard.
- Wide combined frames: Use compatible paired hanging points or a suitable cleat when the frame construction calls for it, and level the assembly before releasing it.
- Rental rooms: Consider a stable easel or a picture shelf that's already properly secured, subject to the tenancy rules.
- Heavy glass builds: Clear the work area and get help lifting rather than balancing the frame over a desk or bed.
Check the view from a seat
A standing adult's eye line isn't a universal hanging height. Lower the center line when the main viewers are seated or use wheelchairs, then confirm that lamps and ceiling lights don't reflect across the text.
Before drilling: Hold a full-size paper template against the wall and check it from the chair, doorway and usual walking route.
Finish with these questions:
- Weight: How heavy is the completed frame?
- Glare: Will reflections obscure the diploma in this room?
- Support: Can the wall and selected hardware hold the assembly?
- Access: Can someone read the text comfortably from a seat?
Buying Mistakes That Leave No Room for the Photo
An attractive frame can still be the wrong purchase. The expensive mistakes usually happen when the buyer approves the finish before checking the opening, depth and layout.
Catch fit problems before ordering
Buying by the diploma's nominal size
Measure the actual sheet on a clean, flat surface and record its orientation, or confirm the paper dimensions with the school. Skip this and you may receive a mat that hides a signature or an insert space that won't accept the document without bending it.
Ignoring mat thickness and opening overlap
Check the board thickness separately from the opening dimensions, and request a layout proof showing which edges the bevel will cover. Skip this and the assembly may be too tight at the back while the visible window crops lettering at the front.
Choosing enough depth for paper but not the portrait
Include the portrait's full thickness, any mount board, the mat, spacers and backing when checking usable rabbet depth. Skip this and a mounted photograph can be compressed against the glazing or prevent the back from closing properly.
Ordering rule: An opening can look correct in a product photograph while the frame's internal depth is still wrong for your keepsakes.
Keep decoration behind construction
Buying a single-opening frame for a paired display
Approve a separate-opening mat layout or choose individual frames before placing the order. Skip this and you may end up covering part of the diploma with the portrait or abandoning the photo altogether.
Matching school colors before confirming the build
Choose the layout, glazing and required depth first, then select a wood finish and mat color that complement the regalia. Skip this and the perfect school-color border may arrive in a frame that's too shallow, too reflective or awkward to hang.
These checks cost little before ordering because they involve measurements and a layout decision. Afterward, a wrong mat or insufficient depth may mean replacing the mat, changing the glazing or reordering the whole frame.
Pick Your Setup and Order With Confidence
- Single diploma, no photo: For the letter-size pairing in the size table, choose a matted frame with UV-filtering glass or acrylic.
- Diploma and hallway portrait: Choose a separate-opening frame for a fixed arrangement, or matching individual frames if the wall may change.
- Office display: Favor glare-controlled glazing, with a text sample to check clarity under office lighting.
- Dormitory, children, pets or frequent moves: Choose UV-filtering acrylic and a lighter frame construction, provided the diploma has no unstable surface material.
- Long-term family keepsake: Use a reproduction portrait, PAT-tested contact materials, reversible mounting and a stable interior wall.
Turn the choice into an order
- Measure the actual diploma. We recommend checking with your school for the correct diploma cover color and size, or measuring the diploma yourself; keep the sheet measurement separate from the cover measurement.
- Choose the layout. Make a paper arrangement of the diploma and portrait, including their mat margins, before deciding between a combined frame and a matched pair.
- Confirm the construction. Record the mat material, backing, photo-contact suitability, mounting method, glazing type and usable frame depth.
- Approve the location. Check the wall for light, humidity, viewing comfort and a suitable fixing position, then confirm the finished hanging load.
- Inspect the delivered fit. Check the openings against the keepsakes before mounting them, and make sure the back closes without pressure.
We offer product samples to customers; confirm which sample is relevant before using it to make a material or color decision. Don't infer a frame specification from a photograph of another graduation product.
The storefront includes several graduation categories, so keep your written frame requirements beside you while browsing.

Compare the diploma frame collection against those requirements rather than choosing by finish alone. A successful order gives the diploma and photograph enough room, keeps both removable and suits the wall where the family will enjoy them most.
Graduation Cap and Gown offers diploma frames and diploma covers alongside academic regalia and accessories for Doctorate, Masters, Bachelors, High School, and Pre-K/Kindergarten milestones. Visit Graduation Cap and Gown with your diploma measurements and preferred portrait layout to compare your options before ordering.