
Decorating your graduation cap is one of the last, most creative things you'll do on your academic journey. It's your chance to turn a standard piece of regalia into a personal statement that tells your story.
The process is pretty straightforward: come up with a design, grab your supplies like glue and glitter, and get to work. But here’s a pro tip right out of the gate: starting with a high-quality matte finish cap makes all the difference. It gives your materials a perfect surface to stick to for a polished, lasting look.
Your Graduation Cap Is Your Final Masterpiece
Think of your graduation cap as more than just a requirement—it's the final canvas of your entire school career. It's a unique opportunity to share your story, celebrate all those hard-won achievements, and give a confident nod to whatever comes next. This guide isn't just about simple craft ideas; it’s about giving you the practical skills and inspiration to create a cap you’ll be genuinely proud to wear.
We'll walk through how to transform that standard matte cap into a personal masterpiece, whether your style is elegantly simple or a bold 3D creation. The secret to a killer design is always in the foundation. Kicking things off with a well-made, affordable cap ensures your design looks professional and holds up through every single photo op.
Why Your Cap Decoration Matters
Let's be real, a decorated cap is so much more than an accessory. It’s a bold piece of self-expression that makes you stand out in a sea of identical gowns. It’s your chance to:
- Thank the loved ones who supported you through it all.
- Showcase your personality with a bit of humor, a favorite quote, or your own artistic flair.
- Represent your future career or the field of study you poured your heart into.
- Celebrate your heritage or give a shout-out to your club or group affiliations.
The perfect design begins with the perfect base. A quality cap from a Graduation Cap and Gown package provides a durable, non-glossy surface that makes decorating so much easier and helps your creative vision stick.
Once you have your cap, choosing the right materials is what brings your idea to life. Pairing your custom cap with vibrant, high-quality accessories really sets the stage for success. For instance, selecting a tassel from a huge range of colors to match your school or your design’s color scheme can tie the entire look together.
It's a small detail, but it elevates your cap from a simple craft project to a cohesive and memorable part of your graduation attire—totally ready for its close-up.
Gathering Your Tools for a Standout Design
Before you can bring that awesome cap idea to life, you need to get your supplies in order. Thinking through your tools is the first real step, and the materials you pick will make or break the final look, durability, and overall vibe of your design.
A stunning cap starts with a great canvas. I can't recommend this enough: use a matte finish cap. Its non-glossy texture gives adhesives and paint something to actually grab onto. This simple choice is the best way to prevent your hard work from peeling or sliding off halfway through the ceremony.
Choosing Your Core Supplies
The adhesive you pick is probably the most critical decision you'll make. For lightweight stuff like cardstock or photos, a good, strong craft glue will give you a reliable hold without creating weird lumps under your design.
But if you're going big with heavier 3D embellishments—think rhinestones, faux flowers, or even small figurines—a hot glue gun is non-negotiable. You need that secure, instant bond to make sure nothing falls off when you toss your cap in the air.
The same goes for your cutting tools. A sharp pair of scissors works fine for simple shapes, but if you're planning on intricate details or using stencils, a craft knife is essential for getting those clean, professional-looking lines.
- For Crisp Lettering: Fine-tipped paint pens are your best friend. They give you the kind of control and precision you just can't get with a traditional brush.
- For Maximum Sparkle: Grab a variety of rhinestones in different sizes to add depth and dimension. A wax pencil tip makes picking up and placing those tiny gems way easier.
- For Breathtaking 3D Effects: High-quality, realistic faux flowers or sturdy cardstock can be layered to create some seriously impressive structures.
If you're still figuring out your style, this decision tree can help you narrow things down before you start buying supplies.
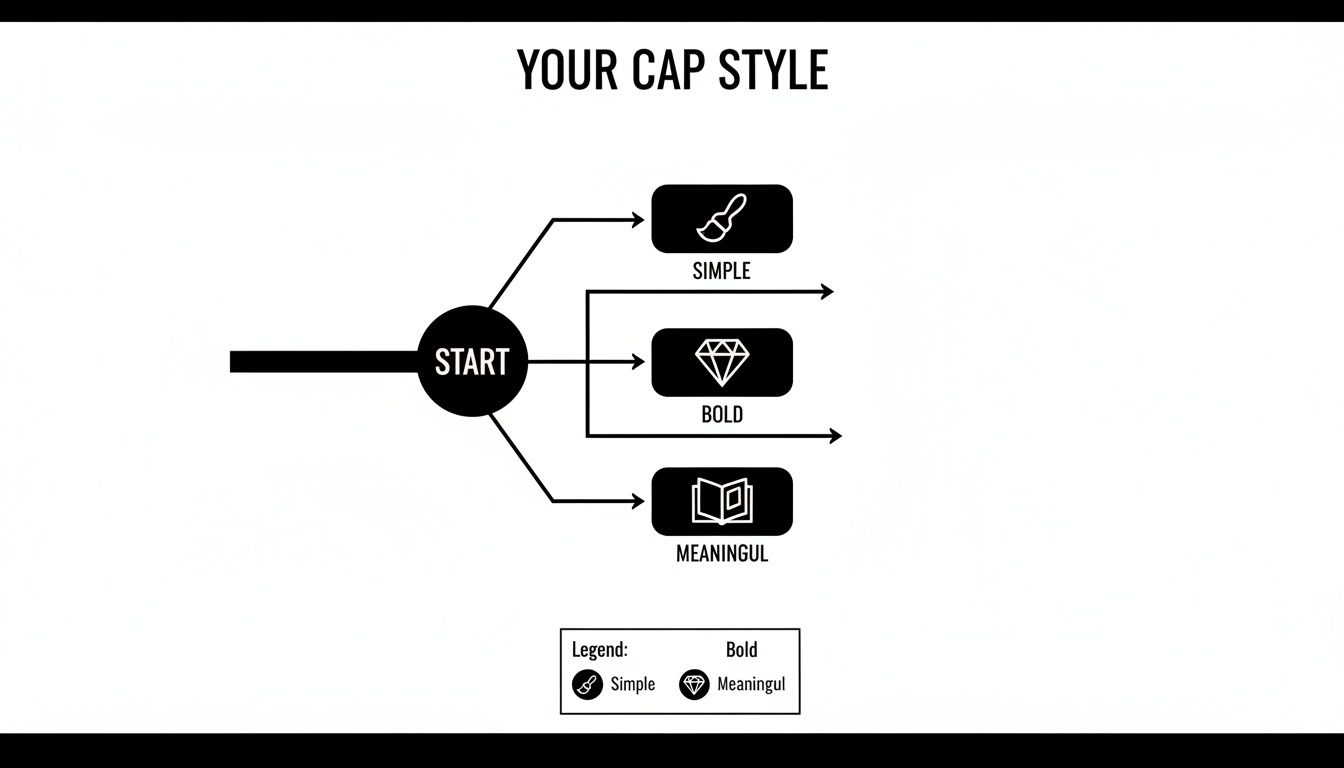
This visual breaks down the most common creative paths, helping you match your materials to the aesthetic you're going for, whether it's simple and clean, bold and loud, or deeply meaningful.
To help you get organized, here's a quick breakdown of the essential tools you'll need based on the style you've chosen.
Essential Supplies for Your Graduation Cap Project
| Decoration Style | Essential Supplies Checklist | Pro Tip |
|---|---|---|
| Simple & Clean | Cardstock or glitter paper, craft glue, scissors or craft knife, ruler, pencil, fine-tipped paint pens. | Use a self-healing cutting mat to protect your table and get cleaner cuts with your craft knife. |
| Glitter & Bling | Loose glitter, Mod Podge or spray adhesive, assorted rhinestones, hot glue gun, wax pencil for gem placement. | Apply a base coat of acrylic paint that matches your glitter color. This will hide any sparse spots. |
| Paint & Lettering | Acrylic craft paints, fine-tipped paint brushes, paint pens (like Posca), stencil sheets or painter's tape. | Sketch your design lightly with a pencil first. It’s much easier to erase a pencil line than to fix a paint mistake. |
| 3D & Floral | Faux flowers, small figurines or charms, foam board for layering, hot glue gun, wire cutters for trimming stems. | Arrange everything on the cap before gluing to make sure you like the composition. Snap a quick photo to remember it. |
Getting the right tools on hand before you start makes the whole process smoother and way more fun.
Essential Prep Work and Accessories
Before you glue a single thing down, check your school's rules. One of the smartest things you can do is create a removable topper.
Just cut a piece of sturdy cardstock to the exact dimensions of your mortarboard (they're usually 9.5 x 9.5 inches), create your masterpiece on that, and then attach it to the cap with removable adhesive dots. This protects the actual cap and means you get to keep your creation forever.
Protecting the cap itself is key. Use painter's tape to cover the fabric around the edges of the mortarboard to prevent accidental smudges from glue or paint. This tiny step makes a huge difference in the final, polished look.
And don't forget the finishing touches! A custom tassel can tie your whole design together perfectly. Did you know the global market for graduation caps and tassels is booming, with a projected 8.9% compound annual growth rate? That surge is driven by graduates wanting to personalize their look, turning standard regalia into a real statement.
Choosing a tassel that matches your school or design colors pulls everything together beautifully. You can learn more about what different colors mean by checking out our guide on graduation tassel color meanings.
Bringing Your Vision to Life with Proven Techniques
With your supplies gathered, it’s time for the fun part—actually bringing your design to life. There are a million ways to decorate a graduation cap, but most designs fall into a few core categories. Getting comfortable with one or two of these popular methods will give you the confidence to turn your vision into a reality you can proudly wear.
Whether you're a seasoned artist or this is your first time picking up a paintbrush, these proven techniques will guide you through the process, making sure your cap looks polished and totally professional.
Mastering Paint and Lettering
Painting is a fantastic way to get a completely custom, artistic look. The real key here is picking the right paint for the job. Acrylic craft paint is what most people reach for, and for good reason—the colors are vibrant, and it dries pretty fast. If you're worried about cracking, fabric paint is an excellent alternative that offers a bit more flexibility.
When it comes to lettering, precision makes all the difference. For clean, sharp lines, you can't beat fine-tipped paint pens. They're your best friend. But if you’re trying to replicate a specific font perfectly, stencils are an absolute lifesaver. Just print out your quote, carefully cut out the letters to make your own stencil, and lightly trace them onto your cap with a pencil before you start painting.
Pro Tip: Don't forget to seal your painted masterpiece! A quick, even coat of a clear matte or glossy spray sealant will protect it from the elements. This simple step prevents smudging and keeps your artwork looking fresh through any weather on commencement day.
Achieving Dazzling Glitter and Rhinestone Designs
If you want a cap that truly shines, glitter and rhinestones are the way to go. The secret to getting that full, no-mess glitter coverage is to apply a thin, even layer of Mod Podge or a similar adhesive where you want the sparkle. Sprinkle the glitter generously over the glue, then gently tap off the excess.
Here's a great trick: apply a base coat of acrylic paint that matches your glitter color first. This helps hide any potential bald spots and creates a much richer, more uniform sparkle.
For those intricate rhinestone patterns, a little planning is crucial.
- Map It Out: Lightly sketch your design with a pencil. A chalk pencil works even better since it’s easier to wipe away later.
- Work in Sections: Apply hot glue in small areas at a time and place your rhinestones quickly before the glue has a chance to cool.
- Use the Right Tool: A wax-tipped pencil makes picking up and placing those tiny gems way easier than fumbling with your fingers.
This methodical approach is the best way to prevent misaligned stones and ensure your design looks perfectly symmetrical and dazzling from every angle.
Creating Stunning 3D Effects
Adding three-dimensional elements can elevate your cap from a flat design to a true work of art. Faux silk flowers are a super popular choice, creating a look that's both beautiful and elegant. To get them to stick securely, trim the stems with wire cutters and use a generous dab of hot glue on the base of each flower.
This same principle applies to any other 3D items you might want to add, like bows, small figurines, or layered cardstock creations. Always arrange your pieces on the cap before you glue anything down. Once you love the layout, take a quick photo with your phone to remember the placement, then glue each element down one by one. This ensures you get the composition just right without the headache of having to remove and re-glue anything.
Of course, the tassel is a huge part of the final look. You can explore our guide for how to put a tassel on a graduation cap to get it just right.
Incorporating Fabric and Cultural Stoles
Your cap can also be a powerful canvas for celebrating your heritage. Incorporating fabric from a cultural or First Generation stole creates a deeply personal and meaningful design that connects your achievement directly to your identity.
Carefully cut pieces of fabric to fit your design, making sure to treat the edges with a fray-stopping liquid to keep them neat and clean. You can attach the fabric with a strong fabric glue or by carefully stitching it onto a removable cardstock topper.
For anyone looking to apply intricate fabric designs or even photos onto your cap, a crafter's guide to iron-on print transfer paper can open up a ton of creative possibilities. This method allows you to integrate complex imagery with a professional finish, making your cap a truly personalized statement.
Find Your Perfect Graduation Cap Inspiration
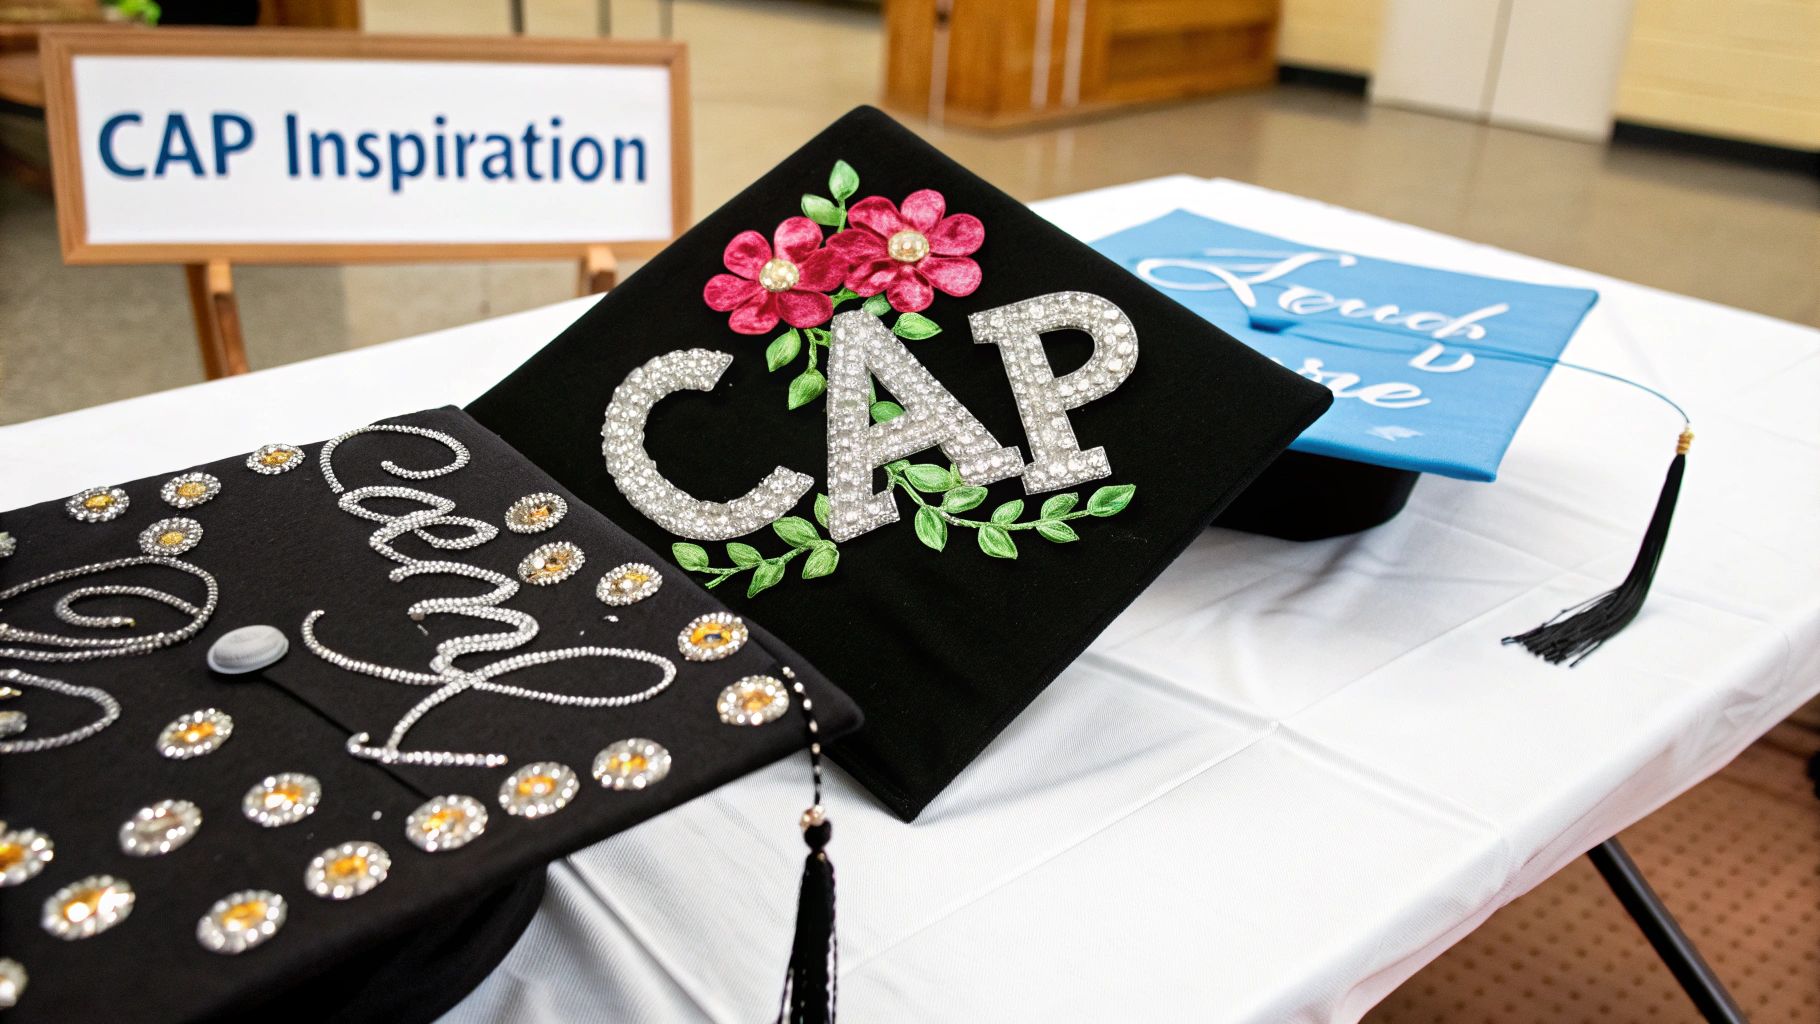
Sometimes the hardest part of a creative project is just getting started. Staring at that blank cap can feel a lot like facing a tough final exam, but don't worry—inspiration is everywhere. The real key is to land on a design that feels authentic to you and tells a little story about your unique journey.
Your cap is a small canvas, but it can make a big statement. Think about what really mattered to you during your studies. Was it the unwavering support of your family? The endless nights fueled by caffeine and a sense of humor? Or the specific passion you discovered in your field? Those are the stories that make for the most memorable designs.
Find Inspiration in Your Field of Study
One of the most popular approaches is to celebrate your major. It’s a powerful way to show pride in your hard-earned expertise and give a nod to your future career. The visual language of your profession offers a rich source of ideas right out of the gate.
- For Nursing and Medical Grads: A stethoscope forming a heart, an EKG rhythm line, or a witty phrase like "Finally done with my BSN" are all fantastic options.
- For Law and Justice Students: Incorporating a gavel, the scales of justice, or a clever quote like "The case is closed" creates a strong, professional theme.
- For STEM Majors: Consider designs with circuit board patterns, constellations for astronomy, or a double helix for biology. A funny quote like "I'm a STEMinist" also works perfectly.
- For Arts and Humanities Grads: Use a favorite literary quote, a painter's palette, or musical notes to represent your creative passion.
These field-specific designs are instant conversation starters and a clear signal of your accomplishments. They show not just that you graduated, but what you dedicated years of your life to mastering.
Ideas Based on Popular Themes
If a major-specific design doesn't quite feel right, you can always draw inspiration from broader, more personal themes that resonate with nearly every graduate's experience. These ideas often focus on gratitude, humor, and personal identity.
A heartfelt "Thank you Mom & Dad" is a classic for a reason—it’s a beautiful, public tribute to your biggest supporters. On the other hand, a witty quote that captures the student struggle, like "Fueled by caffeine and questionable life choices," can be a hilarious and relatable choice. This is your chance to really show off your personality.
Many graduates also use their cap to celebrate their cultural heritage. Incorporating meaningful symbols, flags, or phrases from your background is a beautiful way to tell a deeper story. This approach pairs exceptionally well with specialty garments like a Kente or First Generation stole, creating a cohesive and powerful statement.
The trend of personalizing caps is more than just a fun craft; it's a cultural phenomenon. Search data shows a huge spike in 'graduation cap decorations' queries every single year. This seasonal frenzy makes sense when you learn that 54% of graduates report their decorated cap as the most-photographed item at their ceremony, making it a true centerpiece of the celebration.
For a visual feast of creativity, you can also explore a gallery of decorated graduation caps to see what other grads have done. Seeing real-world examples is often the best way to spark your own incredible idea.
Navigating School Rules on Commencement Day

You've poured hours of creativity into your cap design, and it’s a masterpiece. The absolute last thing you want is to be told you can’t wear it moments before you walk across the stage.
So, before you even think about gluing that first rhinestone, the most important thing you can do is check your school’s rules. Seriously. This one small step will save you a world of stress on graduation day.
Most schools post their commencement guidelines right on their website, usually on the registrar's or student affairs page. A quick search for "graduation regalia rules" or a call to the administration office can prevent a major headache. Pay close attention to the details, because the policies can be surprisingly different from one school to another.
Understanding Common Restrictions
While some schools fully embrace creativity, many have strict rules to keep the ceremony formal and make sure everyone has a good view. If you ignore them, you might be asked to swap your custom cap for a plain one right before your name is called. Not fun.
Here are some of the most common things schools say no to:
- Obstructive 3D Elements: Anything that sticks up too high can block the view for the people sitting behind you. Think big floral arrangements, statues, or anything that turns your cap into a skyscraper.
- Lights or Noisemakers: Flashing LEDs, glitter cannons, or anything that makes noise is almost always a hard no. They’re distracting and can disrupt the ceremony.
- Offensive Content: This one’s a given. Schools will prohibit any language or imagery that’s profane, offensive, or violates the student code of conduct.
- Overhanging Decorations: Be careful with decorations that hang way over the edges of the cap. They can easily get tangled in another graduate's hair or regalia.
The Smartest Strategy: A Removable Topper
The safest, most versatile approach when you're figuring out how to decorate graduation cap designs is to create a removable topper. This strategy is a total game-changer, letting you have your masterpiece and participate in the ceremony, too.
Just cut a sturdy piece of cardstock to the exact dimensions of your mortarboard (they’re usually 9.5 x 9.5 inches). Then, create your entire design on this separate square. When you’re done, attach it to your actual cap with removable adhesive dots or double-sided tape.
This method is a lifesaver. If an official questions your design, you can simply pop the topper off for the ceremony and stick it right back on for photos afterward. It gives you all the creative freedom without risking your walk across the stage.
Finally, think about how you'll get it there. A simple shirt box or even a clean pizza box is perfect for protecting your cap from getting crushed on the way to the venue. I always recommend packing a little "emergency kit" with extra glue dots and a few spare embellishments for any quick, last-minute fixes you might need before the ceremony begins.
Common Questions About Decorating Your Cap
As you get ready to dive into your cap decoration project, a few common questions always seem to pop up. Knowing the answers ahead of time will make the whole process feel smoother and give you the confidence to create something amazing without any second-guessing.
Let's walk through some of the most frequent questions to help you sidestep any common mistakes.
What Is the Best Glue for a Graduation Cap
The right adhesive really boils down to what you're sticking on it. For lightweight things like photos, paper cutouts, or cardstock, a good, strong craft glue that dries clear is perfect. It’ll give you a secure hold without creating ugly lumps under your design.
But if you’re going big with heavier embellishments—think rhinestones, faux flowers, or 3D bows—a hot glue gun is your best bet. It provides the strongest and most immediate bond, making sure your decorations stay locked in place from the moment you put your cap on until the last photo is taken.
Pro Tip: Try creating your design on a separate piece of cardstock cut to the exact size of your cap. Once you're happy with it, attach the entire topper to your cap with removable adhesive dots. This protects the actual cap from damage and turns your design into a beautiful keepsake you can display later.
Can I Decorate a Cap I Bought Online
Absolutely! In fact, our graduation caps are designed to be the perfect blank canvas for your creativity. We strongly recommend choosing one of our matte finish caps because the non-glossy texture gives paint and glue something to really grab onto, which means your design will be more durable and look much more professional.
You can easily pair your custom cap with other accessories to pull your whole look together. Adding a tassel in your official school colors or a commemorative year date drop creates a perfectly coordinated and polished vibe for your big day.
How Can I Make My Lettering Look Professional
For lettering that looks crisp and clean, stencils are your secret weapon. You can find pre-made alphabet stencils at just about any craft store, or you can print out your favorite font from your computer and cut out your own custom stencil.
Start by lightly tracing the letters with a pencil, then go over them with a fine-tipped paint pen for sharp, steady lines. If you're going for a more modern, graphic look, adhesive vinyl letters offer a super clean and easy alternative. And if you want to freehand it? Always practice on some scrap paper first to get your spacing and style just right.
What Are Some Quick Decoration Ideas
If your ceremony is right around the corner, you can still pull off a high-impact design without spending a ton of time. The secret is to focus on a single, bold element that makes a statement.
- Hot glue a large, beautiful silk flower or a statement bow right in the center of your cap for a fast and elegant solution.
- Use pre-made sticker letters to spell out a short, meaningful phrase like "Finally Done" or "On To The Next."
- Let a specialty stole do the talking. If you're wearing a vibrant First Generation stole, for example, you can just add a few matching rhinestones to your cap for a simple, cohesive touch.
For even more tips and answers, feel free to check out our comprehensive graduation FAQs page to get all the information you need.
Ready to create a cap that stands out? Start with the perfect foundation from Graduation Cap and Gown. Browse our full selection of high-quality caps, tassels, and stoles to bring your vision to life. Find everything you need for a memorable commencement at https://www.graduationcapandgown.com.