

Decorating your cap and gown is your chance to make a statement, show off your personality, or give a shout-out to your future. It’s about transforming that traditional mortarboard into a piece of art that’s uniquely you—and makes for some seriously unforgettable photos. These cap and gown decorations are more than just a craft; they're a celebration of your academic journey.
Gathering Your Creative Toolkit
Before you can bring your masterpiece to life, you’ve got to have the right tools. Moving beyond just glitter and glue can open up a whole new world of creative possibilities. The supplies you pick will shape the final look and, just as importantly, the durability of your design. Getting your toolkit together is the first real step in creating graduation memories that will last.

This isn’t just a niche trend anymore; it’s practically a graduation tradition. Recent surveys show that over 70% of graduates are choosing to decorate their caps to express themselves. This reflects a bigger shift where personalization is everything, turning the simple mortarboard into a personal canvas.
Choosing Your Core Materials
The foundation of any great design is the medium you choose. Every material brings a different vibe and requires its own approach.
- Acrylic Paints: Perfect if you’ve got a painter’s touch. They deliver vibrant colors and cover the cap’s fabric surface really well. The only downside? You'll need a steady hand, and things can get a little messy if you're not careful.
- Fabric Markers: A fantastic, less-messy alternative to paint. Fabric markers give you excellent control for detailed lettering and fine-line illustrations, making them ideal for quotes or intricate drawings.
- Vinyl Decals: For anyone who wants a crisp, professional look without having to freehand anything. You can design on a computer and use a cutting machine or just buy pre-made decals for a super easy application.
- Cardstock & Paper: This is your go-to for creating awesome layered, 3D effects. Think flowers, bold letters, and other shapes cut from colorful cardstock—they can add incredible depth and texture to your cap.
To make it even easier, here's a quick look at the most common supplies and what they're best for.
Decoration Supplies At a Glance
This table breaks down the common materials for your grad cap, detailing their best uses, difficulty level, and which adhesives work best.
| Material | Best For | Adhesive Recommendation | Skill Level |
|---|---|---|---|
| Acrylic Paints | Hand-painted art, bold colors | None (paints directly on cap) | Intermediate |
| Fabric Markers | Detailed lettering, illustrations | None (draws directly on cap) | Beginner |
| Vinyl Decals | Crisp text, clean graphics | Self-adhesive backing | Beginner |
| Cardstock | Layered 3D designs, toppers | Craft glue, hot glue, adhesive dots | Beginner |
| Faux Flowers | 3D floral arrangements | Hot glue gun | Intermediate |
| Rhinestones/Gems | Adding sparkle and "bling" | Gem-specific glue, hot glue | Beginner |
Ultimately, the right material just comes down to the look you’re going for and how comfortable you are with different crafting techniques.
Securing Your Design: The Right Adhesives
The glue you use is just as critical as your decorations. The last thing you want is a graduation day disaster because of weak adhesive. On the other hand, the wrong kind of glue can completely ruin the cap’s fabric.
A hot glue gun is a popular choice for its strong, quick bond, especially for heavier items like faux flowers or big rhinestones. For paper and cardstock, a good craft glue (like Tacky Glue) gives you a reliable hold without adding a ton of bulk.
And if you're using a cardstock topper—a separate decorated square that sits on top of the cap—removable adhesive dots are the perfect non-permanent solution.
Pro Tip: Always test your adhesive on a small, hidden spot on the cap first, like underneath the brim. This quick check ensures it won’t bleed through or stain the fabric, keeping your official regalia safe and sound.
Essential Tools for a Professional Finish
Beyond the paints and glues, a few key tools will help you get those clean lines and precise placements that make a design look truly polished. A self-healing cutting mat, a sharp craft knife, and a metal ruler are non-negotiable for cutting straight edges on cardstock or vinyl.
You'd also be surprised how useful a good pair of tweezers can be. They’re perfect for placing tiny, delicate items like individual gems or sequins with pinpoint accuracy.
As you plan your cap, don't forget about the rest of your graduation day look and celebration. While you're crafting your own designs, you might find that professional party decor hire can help source other elements for your post-ceremony party. And for the final touch on your regalia, check out our guide on choosing the perfect tassel charms for graduation to perfectly complement your cap design.
Crafting a Design That Tells Your Story
A decorated graduation cap is so much more than a craft project. It’s your personal billboard, a final statement celebrating the unique journey you’ve taken to get to this day. The best, most memorable designs don’t just happen—they start with a solid plan.
Before you even think about reaching for the glue gun, take a moment to brainstorm what you want your cap to say. This is your chance to create something that feels genuinely you, ensuring your cap and gown decorations are authentic and unforgettable.
Brainstorming Your Core Theme
Every great design starts with a central idea. Your story is entirely your own, so think about what truly defined your time in school. Was it your major? A life-changing passion project? Maybe a single professor who completely shifted your perspective?
If you're looking for a jumping-off point, here are a few classic themes that always work:
- Homage to Your Major: This is a classic for a reason. Future nurses might go with a stethoscope and an EKG line, while art majors could recreate a piece of a famous painting. It's a proud, clear nod to your field and future career.
- A Nod to Your Heritage: Your cap is the perfect canvas to celebrate your cultural roots. Think about incorporating flags, traditional patterns, or even phrases in your native language to honor where you come from.
- Your Favorite Quote: Sometimes, a powerful quote just captures it all—your motivation, your gratitude, or your hopes for the future. Choose words that genuinely moved you during your studies for an inspiring, personal touch.
- Shout-Out to Your Supporters: Let's be real: graduation is a team sport. A simple "Thanks Mom & Dad" or a design dedicated to the family, friends, or mentors who had your back is a heartfelt way to share the spotlight.
Finding Your School Spirit
Once you’ve landed on a theme, it's time to think about color. A visually stunning cap is one that harmonizes with the rest of your regalia. Mismatched colors can make even the most brilliant design feel a little off.
This is where your school spirit comes in handy. Using your university's official colors is a foolproof way to create a cohesive look. Our 'Find Your University' feature is the perfect tool for this—it lets you quickly identify the exact shades for your school. This ensures your cap perfectly complements your gown and any other accessories, like your honor cords or stoles, for a polished, intentional vibe.
To take it a step further, understanding the symbolism behind your regalia can really inspire your design. You can learn more about the deep graduation stole meaning and find ways to coordinate your entire look.
Sketching Your Layout
Never, ever underestimate the power of a quick sketch. Before you commit to gluing anything down, grab a piece of paper and cut it to the size of your mortarboard (they’re typically 9.5 x 9.5 inches). Use it to map out where everything will go. Trust me, this simple step solves most design problems before they even start.
A well-planned layout prevents the single most common design mistake: overcrowding. Your cap has a very limited amount of real estate, and trying to cram too much onto it makes your message impossible to read from a distance. A sketch helps you prioritize your key elements and embrace negative space for a much stronger visual impact.
As you're sketching, focus on two key things:
- Composition: How will you arrange your elements? Will your main message be perfectly centered, or are you going for a more dynamic, asymmetrical layout? Play around with different arrangements to see what feels balanced and catches the eye.
- Typography: If your design includes text, readability is everything. Choose a font that is bold and clear enough to be read from several feet away. You’ll want to avoid overly complex or skinny fonts that will get lost in the excitement of the ceremony.
Taking a little time to plan and sketch things out ensures your cap decoration isn't just beautiful up close, but makes a clear, confident statement as you proudly walk across that stage.
Bringing Your Graduation Cap to Life
Alright, you’ve finalized your design, and now it’s time for the fun part—moving from concept to creation. This is where your vision truly takes shape, turning that plain old mortarboard into a personal statement that’s all you. The whole assembly process is about layering, being precise, and using the right techniques to make sure your work looks polished and lasts through the big day.
Before you even think about touching glue or paint to your cap, the first step is always a quick prep. The fabric on a mortarboard can sometimes have a light film or a bit of dust from the factory or shipping. Just give it a gentle wipe with a clean, dry cloth. This simple move helps adhesives and paints stick properly and keeps your masterpiece from peeling off later.
This initial planning phase is absolutely crucial. When you can visualize the whole process, from brainstorming to the final design, everything just goes a lot smoother.

This flowchart breaks the creative journey down into three clear stages, helping you stay organized and focused from start to finish.
Mastering the Art of Layering
The secret to a professional-looking design is getting your layers down in the right order. Think of it like building a house—you lay the foundation before you put up the walls and add the fancy trim. The same idea applies to your cap decorations.
- Background First: If you’re planning a painted background or a full-coverage glitter base, this is always where you start. Apply an even coat and, most importantly, let it dry completely. Rushing this will lead to smudges and a messy final look.
- Main Elements Next: Once the base is totally set, it's time to add your main features. This means your larger cutouts, primary images, or any big vinyl decals you're using.
- Text and Lettering: Place your quotes or messages after the main elements are secured. This ensures your words sit on top of everything, making them pop and keeping them easy to read.
- 3D Embellishments Last: Finally, add your three-dimensional decorations like faux flowers, rhinestones, or bows. Putting these on at the end keeps them from getting in your way while you’re trying to position all the flatter elements.
The Cardstock Topper Method
One of the most popular and practical tricks in the cap-decorating game is the "cardstock topper" method. This technique involves decorating a separate piece of sturdy cardstock, cut to the exact size of your mortarboard, instead of gluing things directly onto the cap itself.
This method is a game-changer for a few reasons. It’s completely non-destructive, which is a lifesaver if you're renting your cap and have to return it in perfect condition. It also gives you a perfect keepsake you can easily remove and frame after graduation.
To make one, just measure your mortarboard (they're usually 9.5 x 9.5 inches, but always double-check yours) and cut a piece of quality cardstock to match. Don't forget to cut a small hole in the center for the tassel button. From there, you can go wild decorating the cardstock. When you’re done, just attach it to your cap with some removable adhesive dots or double-sided tape for a secure, temporary fit. Our complete guide on how to decorate a graduation cap offers even more detailed steps for this technique.
Pro Tips for Flawless Application
Getting a clean, mess-free application really comes down to a few pro tricks I’ve learned over the years. When you’re using liquid glue, apply a thin, even layer and use tweezers to place tiny items like gems or sequins precisely. For crisp, clean paint lines, painter's tape is your best friend for masking off sections of your design.
And if you want to make your cap truly unique, don't be afraid to look for inspiration in unexpected places. You might find some cool, innovative concepts in these Prom Decoration Ideas that you can totally adapt for your cap. Taking these extra little steps is what ensures your cap looks just as good up close as it does from a distance when you finally cross that stage.
Styling Your Complete Graduation Look
Your decorated cap is the star of the show, no doubt. But pulling together a cohesive look from head to toe is what really makes for unforgettable graduation photos. Think of your cap as the main event, while the rest of your regalia—the gown, stoles, and cords—are the supporting cast that completes the picture. This is your chance to style an outfit that feels both celebratory and deeply meaningful.
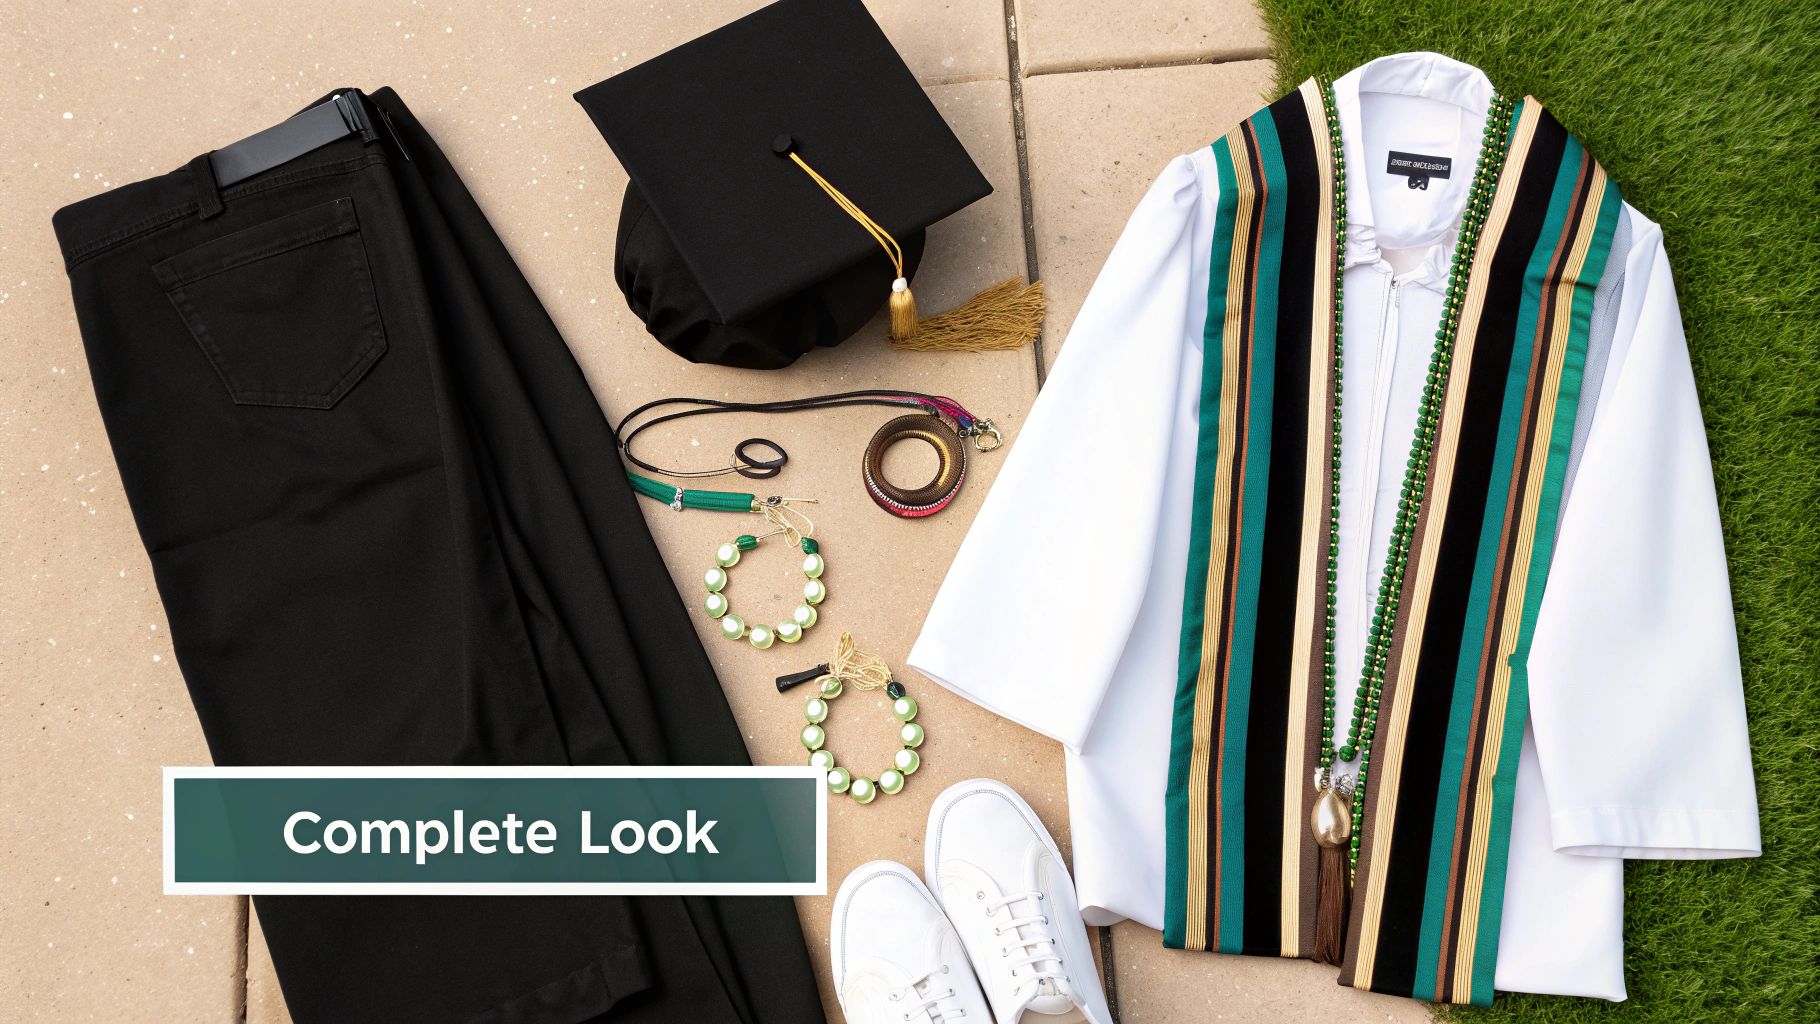
While gowns are almost always kept decoration-free, you can still add a personal touch. Consider non-permanent items like custom pins or brooches that give a nod to your major or a club you loved. These small details can tie everything together without breaking any school rules about altering the gown itself.
Choosing a Stole That Tells Your Story
The graduation stole has become one of the most powerful ways to express yourself. In fact, the Graduation Attire and Accessories market is booming, with "graduation stoles" hitting a peak search interest of 95—far outpacing tassels. It’s the top accessory for showcasing cultural heritage, Greek life, or first-generation status, with personalization making up over 50% of accessory sales. It's clear that custom graduation accessories have become a huge part of the modern ceremony.
Picking the right stole is all about celebrating a key part of who you are.
- First Generation Stoles are a proud declaration of a monumental achievement, honoring the sacrifices made and the barriers you've broken.
- Kente Stoles offer a vibrant, beautiful way to celebrate African heritage and the principles of community, history, and excellence.
- Flag Stoles, like a Serape Stole, let you pay homage to your family's country of origin or your own international experience.
Styling Tip: When you pick a stole, think about how its colors and patterns will play with your cap design. If you go for an intricate Kente or Serape stole, a simpler cap design with complementary colors can create a more balanced and elegant look, preventing your regalia from looking too busy.
The Art of Layering Honor Cords
Honor cords are more than just ropes; they're a visual resume of your academic achievements, society memberships, and special honors. While a single cord is meaningful, learning how to layer multiple graduation honor cords creates a rich, colorful display that showcases the full scope of your accomplishments.
The key to a tasteful display is organization. You want to avoid a tangled mess by thinking about placement and order.
- Start with your primary honor cord. This is usually the cord for your highest academic honor, like summa cum laude. Place it so it hangs evenly on both sides of your neck.
- Add secondary cords. Next, layer on cords for honor societies (like Phi Kappa Phi) or other academic distinctions. Let each cord lie flat against the one before it.
- Make sure they're secure. Gently adjust the cords so they drape neatly over your shoulders and under your stole. The goal is a clean, cascading effect that looks intentional and distinguished.
Coordinating Your Entire Look
Creating a cohesive look is all about seeing your cap, gown, stole, and cords as a single, unified outfit. I always suggest starting with a core color palette. Your school's official colors are the perfect foundation.
From there, pull accent colors from your most prominent accessory—maybe it's the vibrant trim on your First Generation stole or the specific shade of gold in your honor society cord. Use these accent colors in your cap decoration to tie everything together. This kind of thoughtful coordination ensures every piece of your graduation attire works in harmony, creating a polished and deeply personal statement for your big day.
Getting Your Masterpiece Ready for the Main Event
You've poured your creativity into a cap that's a true masterpiece—now it's time to make sure it's ready for its debut. The final steps are all about the little details, from navigating school rules to planning how you'll keep it safe after the ceremony. Getting this right means your hard work gets celebrated without a hitch and preserved for years to come.
Before you call it a day, there's one step you absolutely cannot skip: check your school’s official policy on cap and gown decorations. This isn't just a friendly tip; it's the most critical checkpoint. Many schools have specific guidelines on what’s allowed, and you don’t want to be told you've broken a rule minutes before you're supposed to walk.
Know the Rules of the Road
Most schools love seeing student creativity, but they also have to maintain the decorum of the ceremony. Head to your university's commencement information page or contact the registrar's office to look for rules about:
- Height Restrictions: Decorations that are super tall can block the view for the graduates sitting behind you.
- Offensive Content: Almost every school has a zero-tolerance policy for anything that violates their code of conduct.
- Attachments: Some places might say no to lights, electronics, or anything else that could be a distraction or a safety issue.
A quick check now can save you a ton of stress later.
Don't Wait Until the Last Minute
To avoid that frantic, late-night craft session the night before you walk, it’s a good idea to work backward from your ceremony date. A smart timeline keeps the whole process fun and low-stress.
| Task | Recommended Completion |
|---|---|
| Check School Rules | 4 weeks before graduation |
| Finalize Design & Buy Supplies | 3 weeks before graduation |
| Complete Decorations | 1 week before graduation |
| Apply Sealant (if needed) | 3-4 days before graduation |
This schedule gives you plenty of breathing room, especially for letting paint and glue dry completely. No one wants to deal with smudges or a cap that falls apart during transport.
Transporting Your Cap Like the Treasure It Is
After all that work, the last thing you want is for your cap to get crushed on the way to the ceremony. Don't just toss it in a bag. The best way to get it there safely is in a shallow, sturdy box—a shirt box or even a clean, small pizza box works wonders.
Lay the cap flat inside the box. This is especially important if you have any 3D elements. It’s a simple trick that ensures your cap arrives in perfect condition, ready for its big moment.
Pro Tip: Pack a mini emergency repair kit for graduation day. A small tube of super glue, a few adhesive dots, and a couple of safety pins can be lifesavers. If a gem falls off or a flower comes loose, you’ll be able to fix it in seconds without any panic.
After the Tassel Turn: Care and Display
Your graduation day will fly by in a flash, but your decorated cap is a memento you can cherish forever. With a little care, it can become a permanent tribute to everything you've accomplished.
First, gently clean off any dust or debris. If you used the cardstock topper method, you can just remove it for easy storage. Many graduates choose to display their cap in a shadow box along with their tassel and any honor cords. It’s a beautiful way to create a piece of decor that tells a really important story. For display purposes, you might also be interested in our guide on correct graduation cap tassel placement.
By thinking through these final steps, you ensure your cap and gown decorations aren't just a highlight of your graduation day, but a lasting symbol of your incredible journey.
Got Questions About Decorating Your Cap and Gown?
As you get ready for one of the biggest days of your life, it's totally normal to have questions about the little details. You want your cap and gown to look perfect, and that means getting the decorations just right. To help you feel confident, we’ve put together some straightforward answers to the questions we hear all the time.
What Is the Best Way to Attach Decorations Securely?
The absolute safest and most popular way to do this is with the "cardstock topper" method. Trust me, it’s a game-changer. You decorate a separate piece of sturdy cardstock that’s cut to the exact size of your mortarboard—usually 9.5 x 9.5 inches, but always measure yours to be sure.
Do all your creative work on this cardstock square instead of directly on the cap. Once you love how it looks, just attach it to the mortarboard with removable adhesive dots or double-sided tape. It’s a win-win: you get to keep your amazing creation as a souvenir, and the cap stays pristine, which is crucial if you have to return a rental.
How Far in Advance Should I Start Decorating My Cap?
Procrastination is not your friend here. We strongly recommend getting started at least two to three weeks before your graduation day.
This isn't just a random timeframe; it’s a crucial buffer. It gives you plenty of time to brainstorm, gather your supplies, carefully bring your design to life, and let any paint or glue fully dry. Starting early means no last-minute stress.
Are There Any Types of Decorations I Should Avoid?
Yes, and this is a big one. The first rule is to always check your university's official commencement guidelines. Most schools love seeing your creativity, but they usually have rules to keep the ceremony respectful and safe for everyone.
As a general rule, you should avoid decorations that:
- Block someone’s view: Super tall 3D objects or anything that sticks out too far can be a problem for the person sitting behind you.
- Make a mess: Loose glitter is the main culprit here. It gets everywhere. A much better option is to use glitter glue or seal your design with a strong sealant.
- Violate school policy: Steer clear of anything profane, offensive, or that goes against your school’s code of conduct.
- Are flammable or unsafe: If you’re thinking about adding battery-powered lights, make sure they're specifically designed to be worn safely and are allowed by your school.
How Can I Make My Cap and Gown Look Cohesive?
Creating a polished, unified look is all about coordination. The key is to make sure your cap design complements the rest of your regalia instead of clashing with it. A great place to start is by using your school’s official colors as the main palette for your cap.
This is a surefire way to make sure your design will naturally match your gown. If you're not sure about the exact shades, our 'Find Your University' tool makes it easy to look them up. From there, pull in accent colors from your accessories, like your honor cords or the beautiful trim on a custom graduation stole. If your stole has an intricate design, like Kente cloth, maybe opt for a simpler, more elegant cap decoration that echoes one of its main colors. The goal is a balanced look that thoughtfully ties everything together.
Ready to find the perfect pieces for your graduation day? At Graduation Cap and Gown, we have the largest online selection of high-quality regalia and accessories to complete your look. From custom stoles to honor cords, we have everything you need to celebrate your achievement in style.