

Say you spend an afternoon braiding a gold graduation cord, then learn at the registrar desk that gold belongs to a different honor level. The braid might be neat, but you still can't wear it at commencement.
Learning how to make graduation cords starts with permission, not yarn. Confirm what the cord represents, build an approved sample, then keep the finished cords matched to the right recipients.
Check Your School's Cord Rules Before Buying Materials
A handmade cord doesn't establish eligibility for an honor. Before buying materials, check the recognition category and the school's actual color assignments.
Confirm the category and color
- Identify the recognition. Is this an institution-awarded honor, an organization-approved cord, or a purely commemorative piece? A commemorative cord may be suitable for photographs without being allowed during the ceremony.
- Match the official designation. Check the registrar's policy rather than choosing a color from a general symbolism chart.
Honor cord colors and GPA thresholds by school
| School | Honor level | GPA range | Cord color or combination |
|---|---|---|---|
| Illinois State | Cum laude | 3.65-3.79 | White |
| Illinois State | Magna cum laude | 3.80-3.89 | Lavender |
| Illinois State | Summa cum laude | 3.90-4.00 | Gold |
| Louisiana State | Cum laude | 3.70 minimum | Two purple cords |
| Louisiana State | Magna cum laude | 3.80 minimum | Two gold cords |
| Louisiana State | Summa cum laude | 3.90 minimum | One purple and one gold cord |
| University of Memphis | Cum laude | 3.25-3.49 | White |
| University of Memphis | Magna cum laude | 3.50-3.79 | Crimson |
| University of Memphis | Summa cum laude | 3.80-4.00 | Gold |
These are school-specific assignments, not interchangeable recipes. At Louisiana State, the minimums form a hierarchy: use the combination for the honor level the university awards, not every level whose minimum you meet.
Confirm timing and permission
- Check when eligibility is calculated. Memphis uses the preceding semester's GPA without rounding and confers final honors after grades are certified. Leave the recipient's designation provisional until the registrar confirms the applicable status.
- Check adornment limits and deadlines. Ask whether handmade construction is permitted, whether cords and stoles have a combined limit, and whether an organization needs written approval before ordering.
The overview of academic dress in the United States provides context for academic costume conventions, but those conventions aren't a universal cord-color authorization. The commencement office's rules govern what you can wear.
At Graduation Cap and Gown, we recommend checking with your school before selecting honor cord colors. Our graduation honor cord overview can help you identify the terminology to include in your inquiry.
Practical rule: Save written confirmation of the recognition, color combination, cord count, dimensions, and permitted construction before buying yarn.
Materials and Cord Length You Need Before You Cut
A common starting pattern for a simple DIY honor cord is about 1.5 yards (54 inches) of pre-twisted trim, reserving 4 inches at each end for tassels and leaving roughly 46 inches for the neck loop and front drop before knots, trimming, or shrinkage. Treat it as a starting pattern, not a guarantee of fit. The school's published dimensions govern, and a cord that drapes beautifully on your bench can still end up an inch short once the tassels are tied.
Keep two measurements separate in your planning: finished cord length and working-strand length. Ready-twisted trim only needs allowance for its ends, while loose strands lose usable length as you braid them, so the same finished cord demands very different amounts of material depending on the construction.
Choose the construction before measuring
Starting length by cord method
| Method | Starting length | Allowance rule | Use when |
|---|---|---|---|
| Single straight strand | 4 times finished length | Allow for knots and trimming | The cord hangs as one piece |
| Folded loop over the neck | 8 times finished length | Allow for the fold and the back knot | The cord is folded into a U and tied at the back |
| Pre-twisted double cord, DIY method | About 54 inches (1.5 yards) | 4-inch tassels at each end leave about 46 inches for loop and drop | A quick homemade honor cord |
| Polyester commercial reference | 68 inches finished with 4-inch tassels | Reference only | Comparing a homemade length to a retail length |
| Commercial reference, tassel ends | 62 inches finished | Reference only | Checking a homemade length against a common size |
The working-strand multipliers are conservative macramé planning allowances, not a precise prediction of braid take-up. Braid a short sample first, because your chosen diameter and hand tension determine how much material the construction consumes.
Retail lengths make useful benchmarks for the same reason. The Amazon polyester cord listing specifies a 68-inch cord with 4-inch tassels, and the Jones Awards honor cord listing specifies 62 inches with tassel ends. If your school's requirement falls outside that range, follow the school.
Set up the bench and check the fit
Gather the following before cutting:
- Cord or yarn: Use the approved shade from the same lot, with consistent diameter and twist.
- Measuring tools: Have a flexible measuring tape and a removable midpoint marker.
- Holding tools: Use a taped work surface, clamp, or binder clip with padded jaws.
- Finishing tools: Keep straight pins, tight knotting cord, and small sharp scissors nearby.
- Optional adhesive: Choose a fabric-safe adhesive, and only after testing it on scrap.
Match the approved shade against a physical swatch whenever possible, because a screen image cannot reliably separate neighboring shades. Our honor cord color guide and meanings helps you name the color correctly in your school inquiry, though the institution's assignment is what authorizes it.
Lay the sample flat, mark its midpoint, and drape it over the actual gown rather than a hanger. Adjust until the tassels hang at comparable heights near the waist and any joining knot sits behind the neck.
Never shorten a cord while it lies flat on the table alone. Once the sample passes the drape test, save a labeled offcut so later purchases can be checked for shade, diameter, and construction.
How to Braid a Three-Strand Honor Cord
A tidy braid comes from controlled tension, not pulling as hard as possible. Cotton, rayon, and synthetic cord can all work, but use matching strand diameters unless your approved design deliberately calls for a textured effect.
The main hand movements are straightforward:
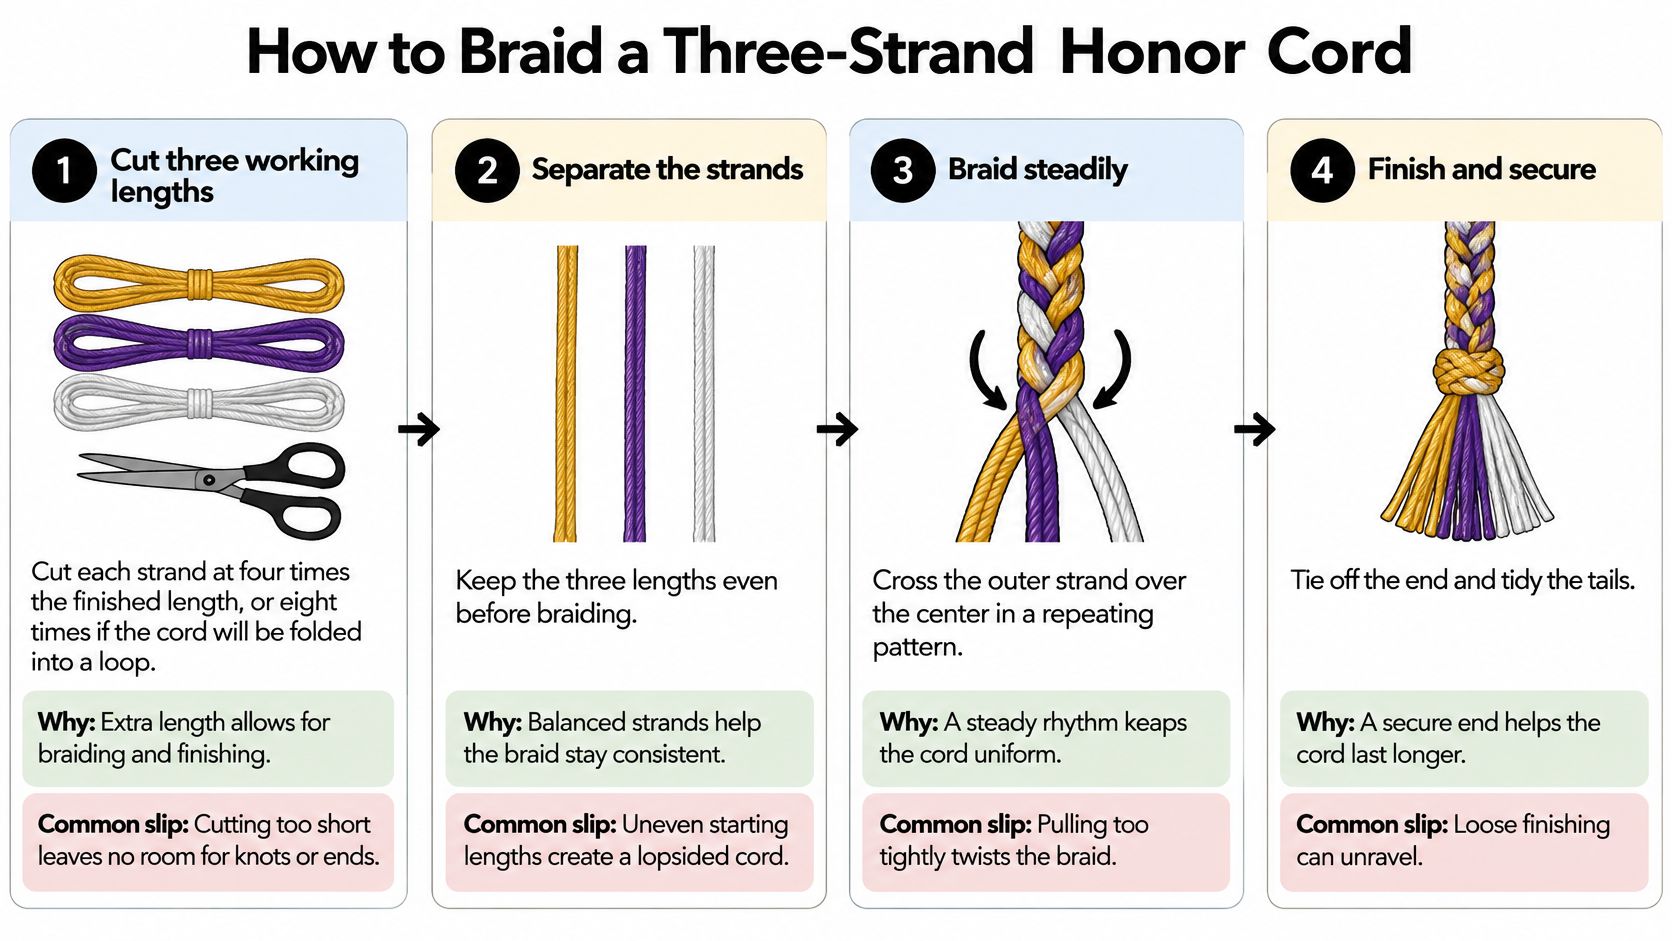
Build the braid with controlled tension
- Cut the working strands. For the three-strand method, cut each length using the conservative allowance in the Fiber Arts Alliance macramé guidance: at least four times the intended finished length, or roughly eight times when folded. Extra material gives you room to braid and finish; cutting exactly to the wearing length leaves you short.
- Align and anchor the starts. Bring the strand ends level and secure them with tape or a clamp. Leave the planned finishing tails outside the working braid. A slipping anchor makes it difficult to distinguish poor hand tension from movement at the work surface.
- Cross the outer-left strand over the center. It becomes the new center strand. Move the outer-right strand over that center, then repeat the alternating sequence. Keep your hands close to the active crossing rather than pulling from far down the loose tails.
- Dress the braid as you work. Pause regularly to flatten the crossings and untangle the free ends. Adjacent strands should sit neatly rather than roll around each other. Don't compensate for a loose patch by overtightening the next patch; undo the uneven area and remake it.
Keep the loose lengths separated on the bench. When they tangle underneath your hands, you can accidentally introduce twist into an otherwise balanced braid.
A smooth braid should bend comfortably around the neck. A rigid braid isn't better simply because it feels tighter.
Control the dimensions and secure the ends
- Check the width against the master. Measure at the midpoint without crushing the braid under the tape. If it's narrower than the accepted sample, examine your tension before continuing. Yarn stretched hard during construction may relax into a different shape afterward.
- Stop with finishing material available. Reach the target braided-body length while preserving the tails and neck-knot allowance established by your sample. Don't braid right to the tips and expect adhesive to substitute for a proper termination.
- Gather the ends mechanically. Use a tight overhand or gathering knot appropriate to the construction. Seat it gradually so the strands share the load instead of leaving a loose strand inside the knot.
- Tuck before trimming. Weave the tails back into the braid or conceal them beneath the gathering wrap. Test the finish with your fingers before removing excess material. Loose tails that merely lie against the braid can work free during handling.
For an approved two-color design, you can instead twist contrasting finished cords together, keeping both colors visible along each hanging side. Don't confuse that treatment with a double honor cord, which consists of individual cords joined at the center.
Record the accepted sample's finished length, braid width, mass, and color arrangement. Keep that physical master beside the workbench, with the completed braid relaxed rather than stretched.
Finishing Tassels, Knots and Ends for Lasting Wear
Choose the fiber before choosing the finish. Cotton provides a soft ceremonial feel; rayon offers sheen but needs gentler handling; high-tenacity nylon suits cords that need better abrasion and moisture resistance.
The military-style nylon cord specification specifies nylon 6,6 with a melting point of 250 ± 6°C. That's a material property, not a recommended heat-tool setting, and it doesn't justify applying uncontrolled heat to a finished graduation cord.
Fiber, finish and what to avoid
| Fiber | Best for | Finish method | Avoid |
|---|---|---|---|
| Cotton | Soft ceremonial cord | Gathering knot, tucked tails, trim after drying | Heat sealing |
| Rayon | Sheen with a soft drape | Gentle overhand knot, glue only after a compatibility test | Heat sealing and excessive tension |
| Nylon 6,6 | Abrasion and moisture resistance | Mechanical knot, controlled heat only after a test on scrap | Excessive heat that can deform the yarn |
| Polyester | Durable synthetic cord | Test any heat finish on scrap, then trim tails | Untested heat or glue |
Make tassels without weakening the cord
Secure the tassel neck before separating the loose strands. Use a straight pin to tease apart small sections, working toward the tips without dragging the pin through the load-bearing braid.
The knot should remain compact while the fringe spreads freely:
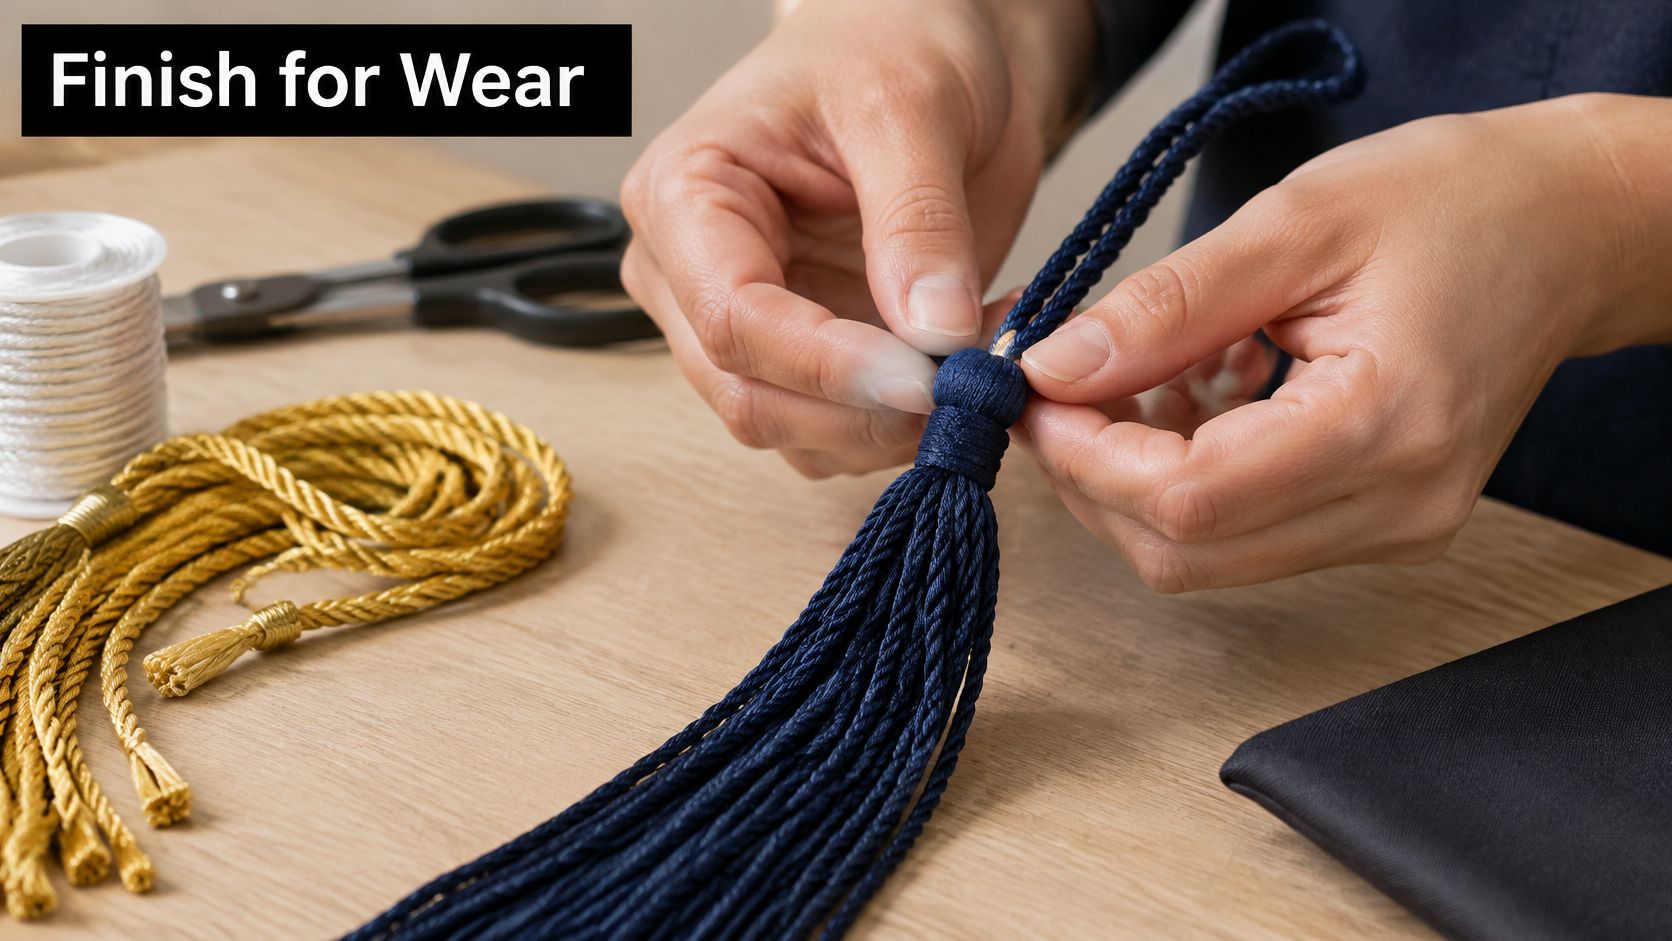
Match the tassels to the approved sample rather than trimming each by eye. Comb them gently with your fingers, lay them flat, then snip protruding threads with sharp scissors.
If adhesive is necessary, apply a small dab inside an already secure knot. Test for stiffness, discoloration, and residue on scrap first, and let it cure fully before trimming the tails.
Never heat-seal cotton or rayon. For thermoplastic fibers, use controlled finishing only after a scrap test; a melted hard bead can look untidy and feel uncomfortable against the gown.
Reject defects before packaging
Check the cord under light tension, then relax it and inspect again:
- Visible slippage: Pull opposing sections gently and watch whether the knot moves.
- Fraying at the knot: Look for damaged fibers where the strands bend sharply.
- Diameter changes: Find bulges, thin patches, or exposed loops along the braid.
- Color transfer: Press a damp white cloth against a scrap or inconspicuous area and inspect for bleeding.
Reject rule: A cord that slips or transfers color goes back for correction. Packaging doesn't make a weak finish acceptable.
Use a pull test firm enough to reveal movement without treating ceremonial trim like climbing rope. Once it passes, check the honor cord wearing guide for positioning and store the cord loosely so the tassels aren't crushed.
Running a Bulk Batch Without Color or Name Mix-Ups
Bulk production isn't just faster braiding. The costly mistakes are often a correctly made cord in the wrong recipient's bag, an outdated eligibility list, or a substitute shade introduced halfway through production.
The University of South Carolina Beaufort regalia guidance describes registrar verification of honors and an eligible-student list supplied to the bookstore. Treat recipient authorization as an administrative record, not something the craft team infers from a student's preferred color.
Separate authorization from assembly
Ask the responsible office for the approved recipient list and identify who can authorize changes. Keep academic honors, organization recognition, and commemorative pieces in separate categories.
Use a shared production sheet with fields for recipient name, recognition category, approved colors, cord count, approval status, and packing status. Limit editing access so a casual correction doesn't unexpectedly replace an official designation.
This checklist keeps recipient checks visible during production:
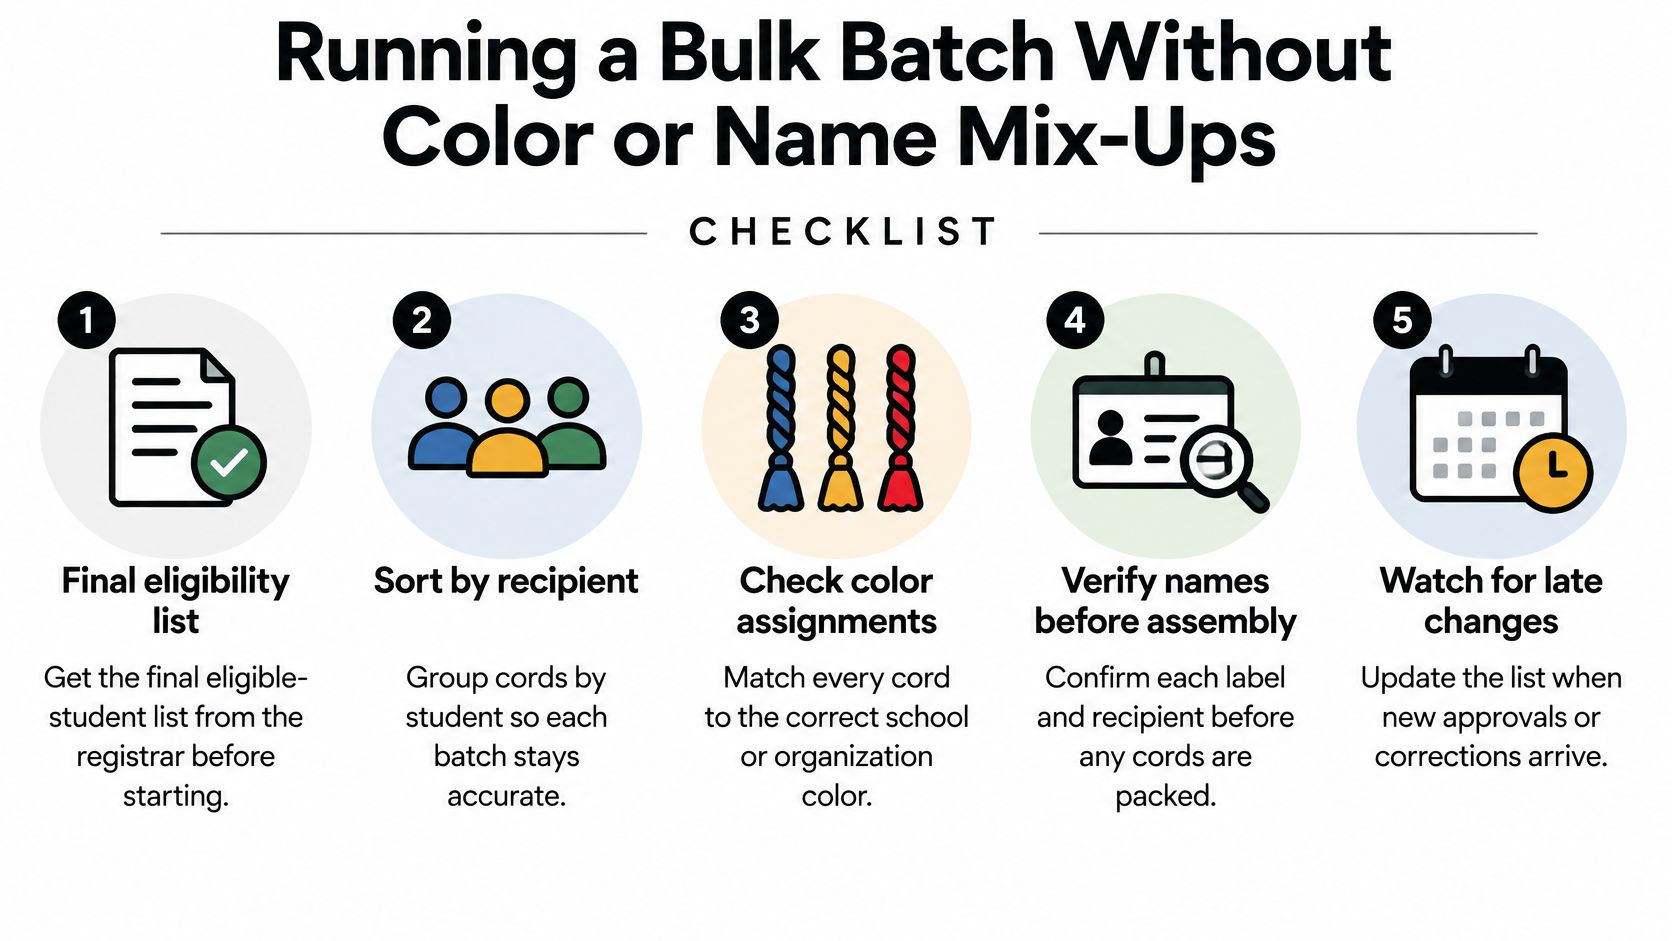
Use manageable lots and independent packing checks
Organize the work around checkpoints rather than a pile of finished cords:
- Approval checkpoint: Submit organization requests before the school's deadline and hold unapproved designs out of production.
- Material checkpoint: Buy the run from the same yarn lot and keep the master sample available.
- Assembly checkpoint: Work in small, manageable lots, comparing length and appearance before moving on.
- Quality checkpoint: Apply the pull and damp-cloth tests before cords reach the packing station.
- Packing checkpoint: Label every bag with recipient, category, color combination, and cord count, then have another person compare it with the authorized list.
- Change checkpoint: Keep spare approved cords separate and record every late reassignment.
For a hypothetical student-group run, you might organize lots of ten to twenty cords and begin assembly two to four weeks before pickup. That's a planning example, not a universal lead time; institutional approval and material availability may require an earlier start.
Don't print final labels from a provisional list. If eligibility is still pending, identify the materials by design code and keep recipient assignments separate until authorized.
Budget for waste, packaging, replacements, and the time needed to check names. Where students or organizations must fund their own cords, publish the contribution and reimbursement arrangement before collecting money.
A shared assembly session can reduce labor costs, but it shouldn't become a condition for receiving earned recognition. Offer a collection route for students who can't attend or personally assemble their cord.
Decide Whether to Make Your Cords or Order Them
Buy the approved version when the school controls the award or requires an official supplier. If the institution distributes earned-honor cords, arrange collection rather than making a replacement that looks similar.
Compare the finish as well as the appearance when weighing handmade against ready-made:
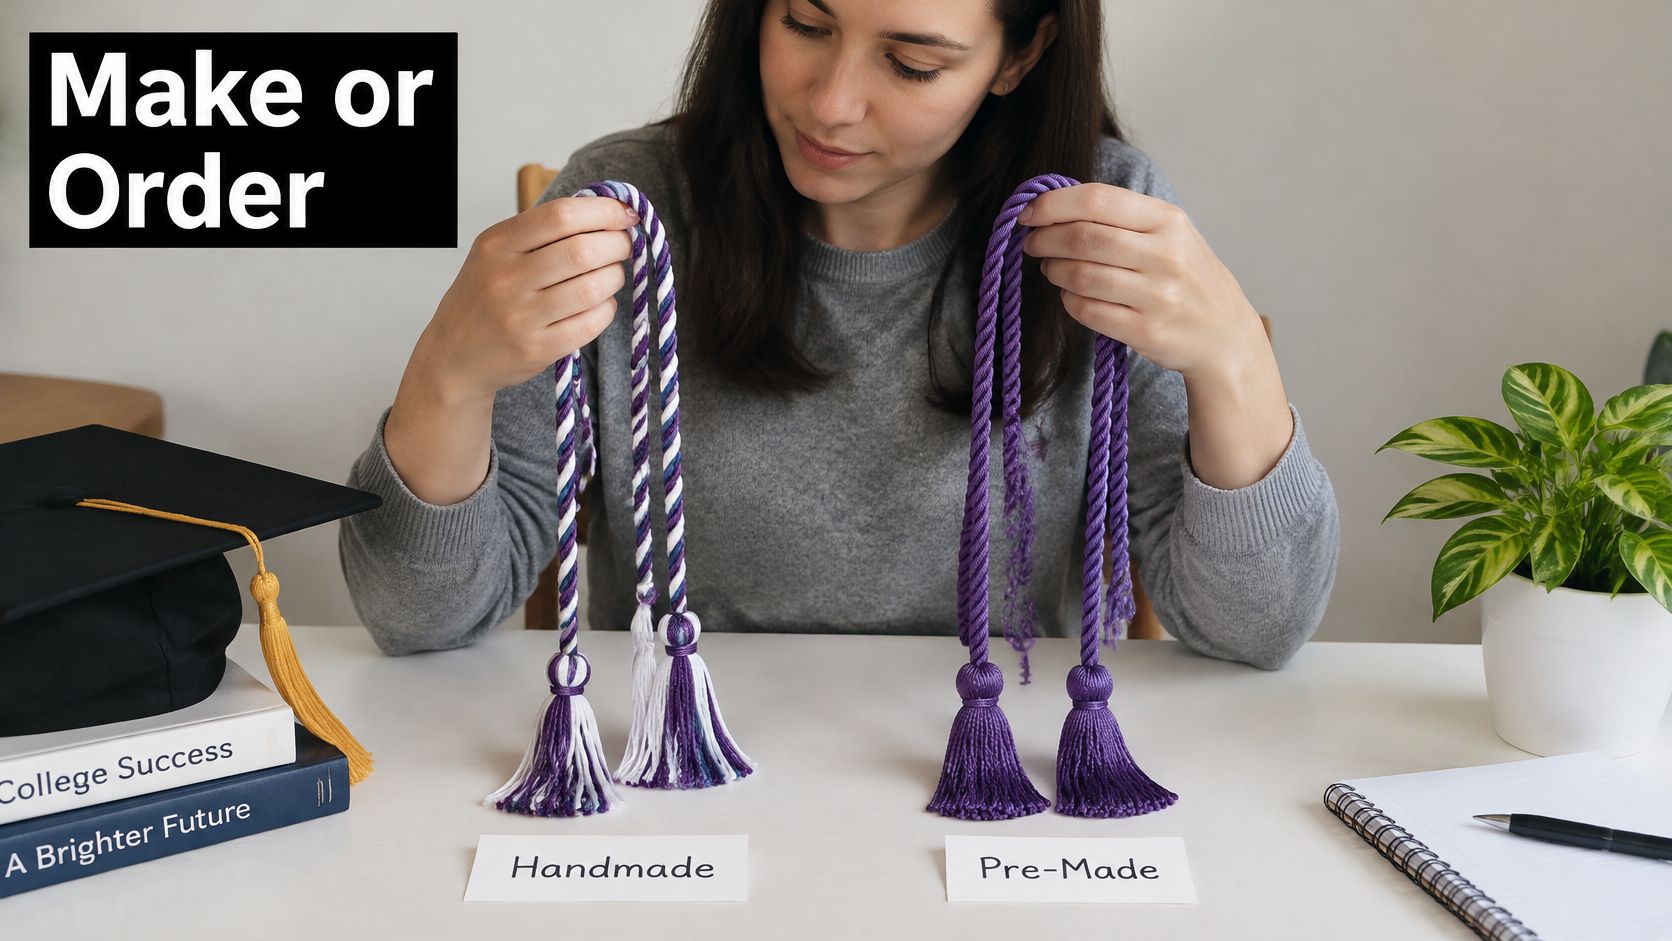
DIY makes more sense for a small, approved organization or cultural-group run where a particular color arrangement matters. It makes less sense when you need uniform dimensions quickly and nobody has time to remake failed samples.
Compare the complete cost
A 2025 Accio marketplace analysis reports retail graduation cords generally costing $5 to $12 each on business-to-consumer platforms such as Amazon. Use that as a comparison range, not as a quote for your approved design.
Before choosing, complete this short checklist:
- Confirm approval: Establish whether handmade or independently purchased cords are allowed.
- Count recipients: Separate confirmed recipients from pending additions.
- Price materials: Include cord, tassel supplies, adhesive, labels, packaging, and waste.
- Estimate labor: Time the accepted sample, including finishing and inspection.
- Choose the dependable route: Compare the full handmade cost with an approved ready-made option.
Don't count volunteer time as unlimited. A cheap spool stops being economical when inconsistent braids require repeated repairs.
For a visual introduction to the finished accessory, watch the following video:
Our custom honor cord guide can help you prepare the design details for an approved order. We offer product samples, size/color/fabric guides, order forms, and payment options; for a coordinated custom stole, gown, or diploma cover, we can create a mockup when you email the information about what you want to order.
Your first action this week is to get the school's written cord requirements. Then choose making, ordering, or official pickup based on that answer, not on which color looks best.
Graduation Cap and Gown offers Single, Double, Intertwined, Kente, and LGBTQ honor cords alongside related academic regalia. Once your school confirms the permitted design, visit Graduation Cap and Gown to compare ready-made options and use the available samples and guides to check your selection before ordering.